What is customer segmentation?
Customer segmentation is a process of dividing and sub-dividing a list of contacts into smaller groups based on similar or common characteristics. This allows you to target and contact each group more efficiently and effectively leading to higher profitability and ROI.
Why segment your contact list?
Taking a one size fits all approach to your marketing does not address the specific needs of all of your customers or prospects. In some cases, you can annoy and upset your contacts by sending irrelevant messages which could lead to them not reading further messages or even unsubscribing. This in turn, specifically with email marketing, can harm your delivery rating to the point where active contacts do not receive your emails.
It is generally accepted that if you have a list of 30,000 contacts, it is better to target and send 500 emails to the 500 people most likely to be interested in a specific offer than to send a message to the whole list.
How does segmenting with arpReach work?
arpReach has one of the most powerful and flexible segmenting engines available in any autoresponder software. You can create an unlimited number of segments that filter contacts into or out of a segment based on one or more of the available data elements you have for each contact.
These include (but are not limited to):
- Standard Form Fields
- Custom Form Fields
- Tags
- Categories
- Links Clicked
- Messages Opened
… and much more.
A segment is simply a list of criteria that determine whether or not a contact will be a member of that segment.
You can create as many segments as you need and save them for ongoing use.
Creating / Editing a Segment
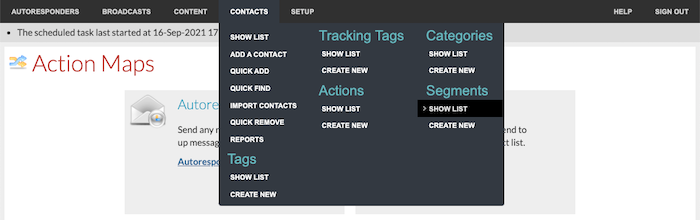
To create a new segment, go to Contacts / Segments / Create New:

… or choose Create a segment from the I want to… menu on the Segments list screen:

The options are the same for both defining a new segment and editing an existing segment definition.
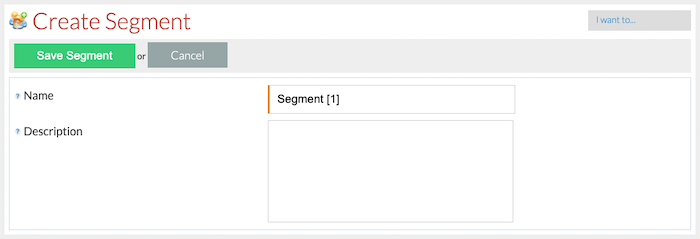
- Name – enter a name for the segment.
- Description – enter a description for the segment.
To manage existing segments, go to Contacts / Segments / Show list:
Each segment has one or more criteria. Hovering over the Choose action… drop-down gives access to each segment’s options.
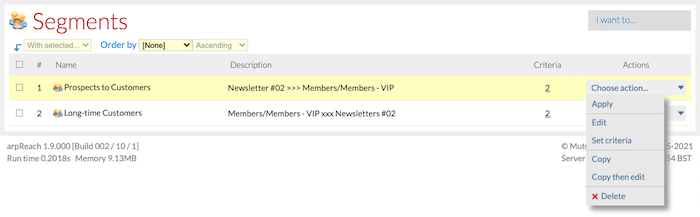
You can edit an existing segment by choosing Edit from the actions column on the Segments list screen.
Defining Segment Criteria
When you have saved the name and description, choose Set Criteria from the actions column on the Segments list screen or click on the number under the Criteria column to define the criteria for the segment.
This will display the criteria list for the segment.
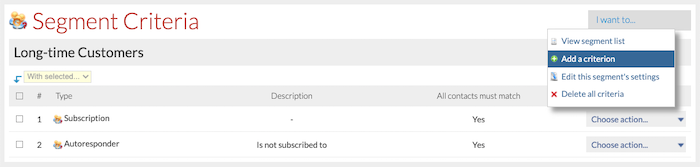
To add a criterion to a segment, select Add a criterion from the I want to… menu located at the top right of the screen.
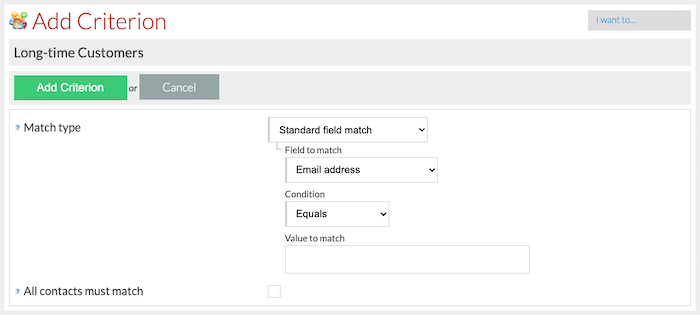
- Match type – choose the type of match for the criterion. The choices are:
— Standard field match (various options)
— Added today
— Added yesterday
— Added this week
— Added this month
— Added last month
— Added this year
— Added last year
— Date added (before / on / after)
— Date added (between)
— Autoresponder (is / is not subscribed)
— Follow-up (sent / opened / bounced)
— Subscription (various options)
— Broadcast (sent / opened / bounced)
— Tracking tag (has / does not have it)
— Category (is / is not a member)
— Clicked link (clicked / did not click)
— Custom field match (various options)
— Unsubscribed (to an autoresponder)
— Imported subscribe date/time (on or after / on or before)
— Tag (has / does not have tag)
When you have chosen the match type, choose the Condition (e.g., equals, contains, etc.) and enter or choose the data to search for. Note that the available conditions will vary depending on the Match type you select. In the example image above, the Value to match is an option where you will type in the criteria you require. - All contacts must match – if this box is checked, every contact in the entire segment must match this criterion no matter the other criteria that are defined in the segment. Adding more criteria to a segment will include more contacts. But if the All contacts must match option is set for a criterion, then any contacts who match other criteria in the segment but not that one will be excluded from the list of matching contacts.
Viewing Matching Contacts
From the Segments list screen, choose Apply from the Actions column. You will be taken to the Contacts list screen with the segment applied.
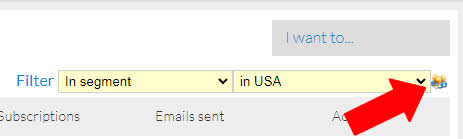
Another way to apply a segment to your contact list is to choose In Segment from the Filter drop-down menu on the Contacts list screen, then choose the segment to be applied.
If the result of the segment is not what you expect, you can quickly get back to adjusting the criteria by clicking the ‘people icon’ to the right of the Filter below the I want to drop-down.