Check for Updates

At any time, you can check if there is a newer version of arpReach by going to Setup / Check for Updates:

Check for Updates — Running an old version

Check for Updates — Running the latest version
For best performance, we recommend that you always run the latest version of arpReach. This is available for download from the arpReach Hub providing you have an active Updates and Support plan.

reCAPTCHA Keys

Using reCAPTCHA keys as part of your form-based sign-up process will significantly reduce the number of fake and malicious sign-ups to your system. By using reCAPTCHA keys, you benefit by having increased email deliverability because you send fewer emails to “bad” email addresses and you also help to reduce the amount of spam and malicious emails that get sent.

Registering for Google reCAPTCHA

Before you can use reCAPTCHA, you need to sign up for an API key pair for your site at:

https://www.google.com/recaptcha/admin

After signing up, you will need to register the site(s) that you want to use reCAPTCHA with.

Google provides full details here:

https://developers.google.com/recaptcha/intro

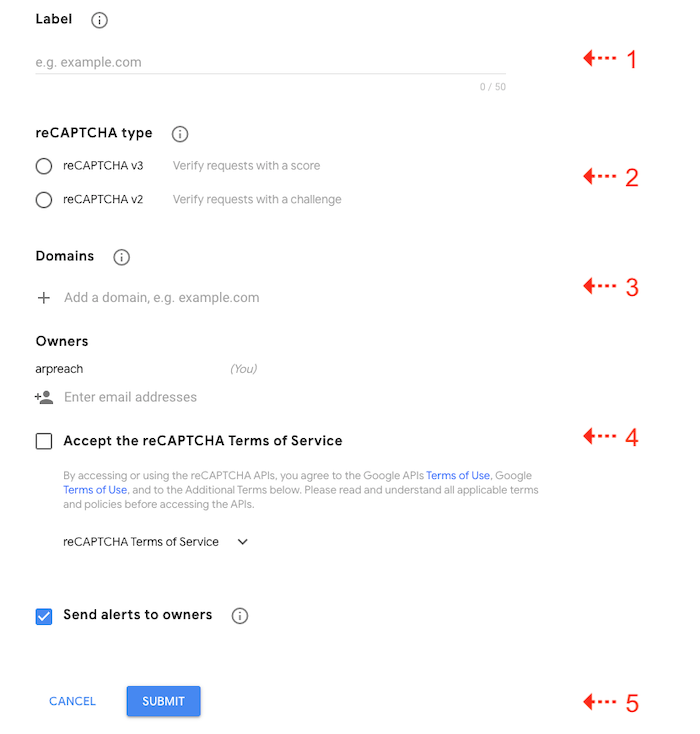
In the reCAPTCHA site setup screen:

  1. Enter your desired label
  2. Choose the type of reCAPTCHA you want to use
  3. Enter the domain/s where you will be using the reCAPTCHA
  4. Accept the reCAPTCHA Terms of Service
  5. Click the SUBMIT button

Note that selecting reCAPTCHA V2 will expand the screen so you could choose what type of reCAPTCHA V2 to use:

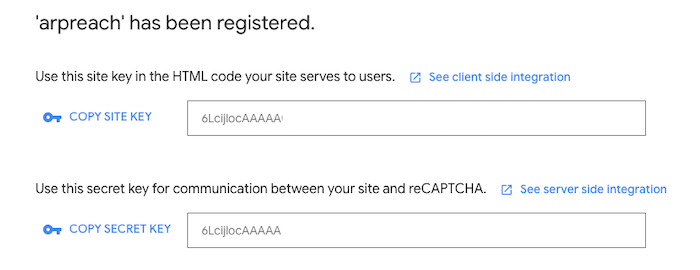
After clicking the SUBMIT button, your reCAPTCHA keys will be created:

Copy the LabelSite Key, and Secret Key needed for the next step. We recommend you save them temporarily in a text file.

Managing Your reCAPTCHA Keys

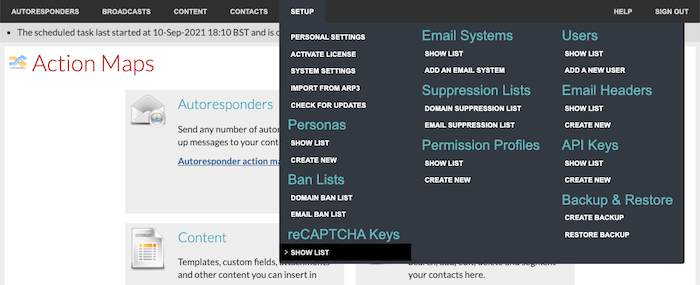
To manage your reCAPTCHA keys, choose Setup / reCAPTCHA Keys / Show List from the menu bar:

To add a new reCAPTCHA key, choose Add a reCAPTCHA key from the I Want To… menu on the reCAPTCHA Keys list screen:

To edit an existing reCAPTCHA key, choose Edit from the Actions column on the reCAPTCHA Keys list screen:

When creating or editing a reCAPTCHA key, the settings are the same:

  • Site Name – this MUST be the same as the label that appears in the reCAPTCHA site.
  • Site key – the site key.
  • Secret key – the secret key.

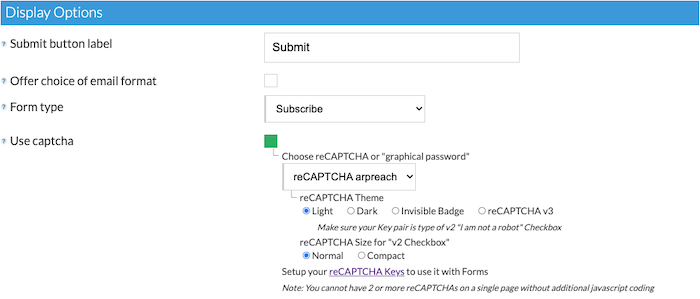
You will now be able to use reCAPTCHA in the forms you create for each autoresponder.

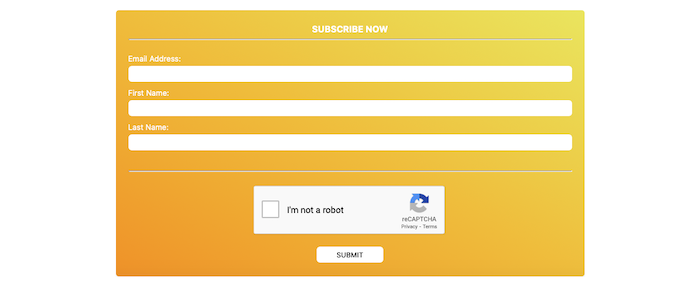
This is an example of a subscription form with the reCAPTCHA V2 Checkbox (styled and formatted using an HTML editor):

… and this is an example of a subscription form using either the reCAPTCHA V2 Invisible Badge or reCAPTCHA V3 (styled and formatted using an HTML editor):

Remember that each reCAPTCHA can only be used on the domains you chose when setting up the keys at the reCAPTCHA site.

We recommend that you create new keys for each domain that you want to use your forms on so that you get good analytics.

Installation Overview

#V2 and arpReach can be installed by anyone. It does require a basic understanding of how to modify and upload files, as well as an understanding of how to make changes and adjustments to your web hosting using either a hosting control panel or command line interface.

This guide outlines the basic installation principles.

Professional installation services

For people who do not want to install #V2|arpReach themselves, we offer a range of professional services.

Professional installation, upgrade, and domain and/or web host migration services are available from our partner:

https://arpreach.com/install

Installing #V2 or arpReach

We have produced this installation guide for people wanting to install #V2 or arpReach.

The process is simple to follow, so please go through the steps one by one.

Please also ensure that your server meets the minimum system requirements before installing the software.

Note about case sensitivity

Directory and file names on a Linux server are case sensitive. So, for example, the directory mail is different from MAIL. On a Windows server, they would both reference and be the same directory.

General Overview

Intelligent, automated email marketing

A permission-based automatic follow-up system for your website, in combination with sending highly targeted broadcast messages, will help you to build trust with your contacts, increase sales dramatically, boost your efficiency, and save you time.

In short, a follow-up autoresponder is an “email-on-demand” system that automatically responds to emails sent to your domain or when a form is completed on one of your web pages.

Follow-up autoresponders reply with a pre-written email message or a series of emails. For a long time, the functionality of autoresponders was very limited in that you could only receive one message back. That made autoresponders a great way to send information, but they weren’t too effective at increasing sales.

But why?

Because it normally takes around 7 to 12 exposures to a product or service before most people will buy!

Email marketing can boost your profits on auto-pilot.

So clearly, creating only one exposure with a single autoresponder message wasn’t getting the job done – potential customers simply weren’t being exposed enough to the product. Not only that, but the two vital ingredients for a sale were not there – trust and credibility.

With #V2|arpReach, you can automatically send a series of pre-written follow-up messages or one-off broadcast messages that are almost certain to boost your response rate. At its most basic level, here’s how it works.

You set up a series of messages that are sent to your prospect over a set number of days. For example, message #1 may go out immediately, message #2 in two days, #3 three days later, and so on.

By doing so, you can “stagger” your contacts with your potential customer and not overwhelm them, but at the same time, you’re making those vital exposures needed to close the sale.

As you will discover over the years, arpReach has been in development and it has become much more than “just an autoresponder”. It gives you the power to identify and group your contacts into highly focused segments automatically. Its email marketing automation capabilities give you the flexibility to run highly effective and intelligent marketing campaigns almost hands-free.

How to use this guide

In this guide, we cover the installation and basic use of #V2|arpReach.

In the sidebar, you will find navigation links to each section. As you visit each section, a new sub-menu will appear providing easy access to the details you need.

We have put this guide together in a logical order. We recommend that you go through the various sections in order for you to understand the power and flexibility that #V2|arpReach gives you.

With power and flexibility comes responsibility and a learning curve. The learning curve may seem daunting, but experience tells us that doing one thing at a time will pay the best dividends. And if you do get stuck, our support team is available to help you.