Variables are small blocks of information (e.g., prices) that you manage centrally. You use simple tags such as {VARIABLE_Price} to insert the information into follow-up and broadcast messages. If you change the content of a variable, the new information will automatically be used in your messages without having to edit them.
In this section:
- Managing your variables
- Nested Variables (#V2-exclusive)
“Variables are great for small snippets of information that you need to insert into messages but may need to keep changing”
Managing your variables
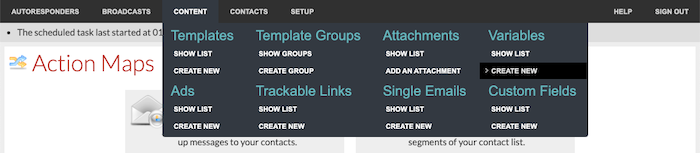
To create a new variable, go to Content / Variables / Create New.
When creating a variable, you need to supply:
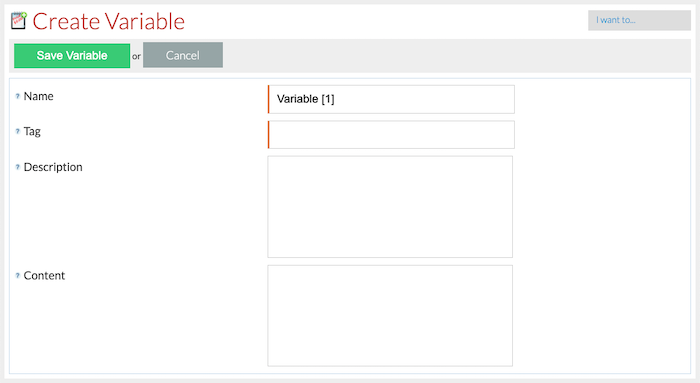
- Name – a unique name for the variable.
- Tag – a unique tag for this variable. Use tags to insert the variable’s content into messages. For example, your variable tag is Discount_Price. You would use the tag/shortcode {VARIABLE_Discount_Price} to insert the variable’s content into a message. Using {VARIABLE_Discount_Price Call For Details} would display “Call For Details” if no content is stored for the variable Discount_Price.
- Description – a description for this variable. This is never displayed to contacts.
- Content – the content that will be inserted into messages.
#V2-exclusive: The content can be plain text or HTML.
If the content contains HTML, the tag/shortcode {VARIABLE_Discount_Price Call For Details} will display the HTML version in HTML/multi-part messages and the RAW HTML in plain text messages. To display just the content in plain text messages, wrap the shortcode to be shown inside the HTML to TEXT conversion code: {HTML_TO_TEXT {VARIABLE_Discount_Price Call For Details}} (note the space between the word TEXT and the second open curly bracket). In the image below, you will see how the shortcode is being used on a broadcast message’s content in both plain text and HTML formats.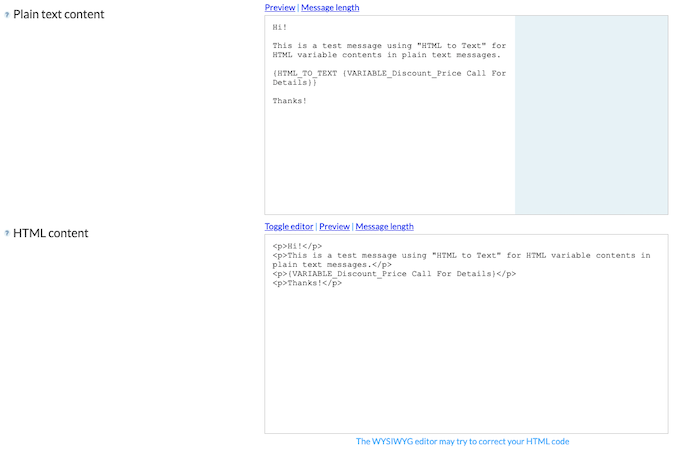
To edit a variable, go to Content / Variables / Show List:

… and choose Edit from the Choose action… drop-down menu.
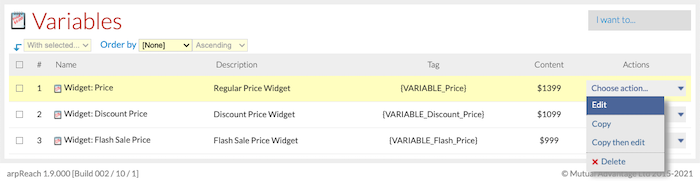
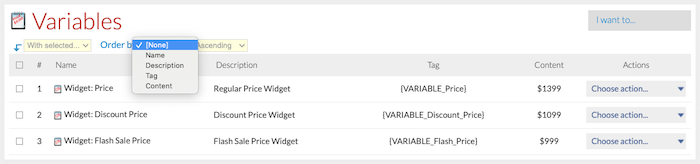
Variables can be sorted by name, description, tag, or content using the Order by drop-down menu.
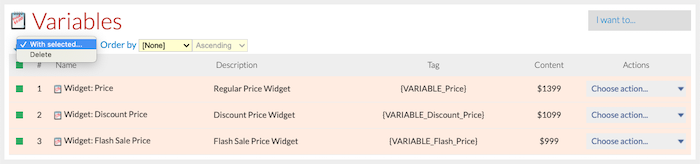
The With selected… menu allows you to delete the selected variables.
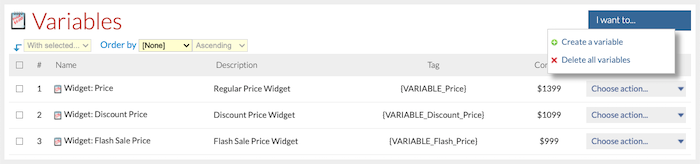
Using the I want to… drop-down menu, you can create a new variable or delete all variables.
Under the Actions column, the Choose action… drop-down menu has the options to:
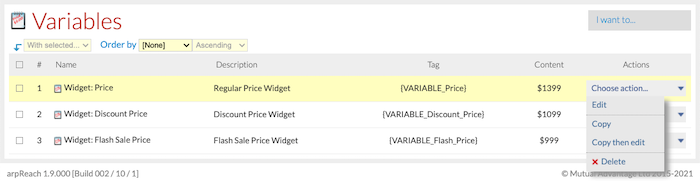
- Edit
- Copy
- Copy then edit
- Delete
#V2-exclusive: Nested Variables
#V2 allows you to work in a smart way to deliver highly topical content to your contacts by using Nested Variables.
A nested variable is where two or more variables are joined together to provide a more focused level of content based on your contacts needs or wants.
As an example, look at this HTML code which uses a nested variable:
<p>It looks like you are based in {VARIABLE_Country_{COUNTRY_CODE __NONE__}}.</p>
To explain it, we can break this code down into its elements by color:
- {VARIABLE_Country_xxxxxxx}
- {COUNTRY_CODE xxxxxxx}
- __NONE__
1 is the main variable Country_.
2 is, in this case, a two-letter country code which is called from and set in the Standard Contact fields.
3 is the default text that will be shown if a contact does not have a country code assigned in the Standard Contact fields. (If you have set up IP2Location, you should get a country code for all contacts.)
Let’s say you only created variables for contacts in the United Kingdom and the United States of America, the two-character country codes are GB and US.
By using Nested Variables, #V2 would convert the full variable for contacts in the UK and the USA to:
{VARIABLE_Country_GB}
{VARIABLE_Country_US}
Continuing this example, because you did not set up a variable for contacts in, say, Australia, Australian contacts would receive messages with the default variable (which you must setup):
{VARIABLE_Country___NONE__}
If you create and save the following as variables:
| NAME | TAG | CONTENT |
|---|---|---|
| Country GB | Country_GB | the United Kingdom |
| Country US | Country_US | the United States of America |
| Country NONE | Country___NONE__ | a lovely part of the world |
The HTML code we started with:
<p>It looks like you are based in {VARIABLE_Country_{COUNTRY_CODE __NONE__}}.</p>
… would display the following message for contacts in the UK:
It looks like you are based in the United Kingdom.
… the following message for contacts in the US:
It looks like you are based in the United States of America.
… and the following message for contacts in Australia or any other country that has not been configured (Because they will see what is detailed for __NONE__ ):
It looks like you are based in a lovely part of the world.
Of course, if you do create a variable for the county code AU with the content “Australia”, Australian contacts would see the message:
It looks like you are based in Australia.
You are limited only by your creativity when using Nested Variables, but make sure to thoroughly test your messages before you make them live.