In this section, we will discuss email systems and go into detail on:
- Adding or editing an email system
- How to comply with the sending limits of your server
- Setting up an FBL (Feedback Loop) (#V2-exclusive)
arpReach allows you to add as many local and remote email systems as you need. They can be local MTA systems, such as Sendmail or Exim, or SMTP servers that may or may not require authentication.
“You can create as many local and remote email sending systems as you need”
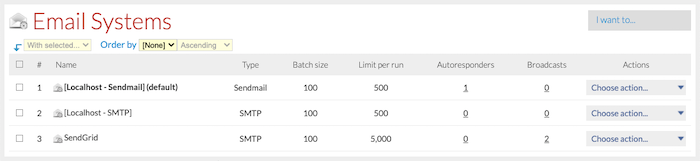
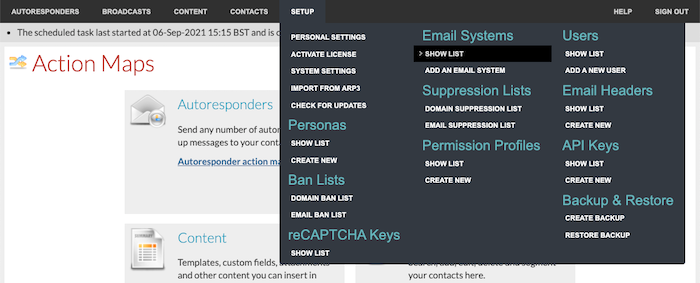
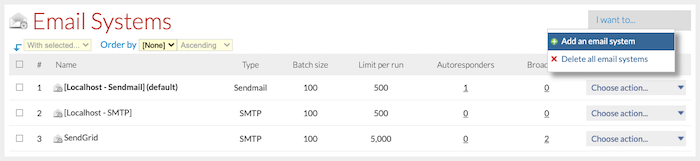
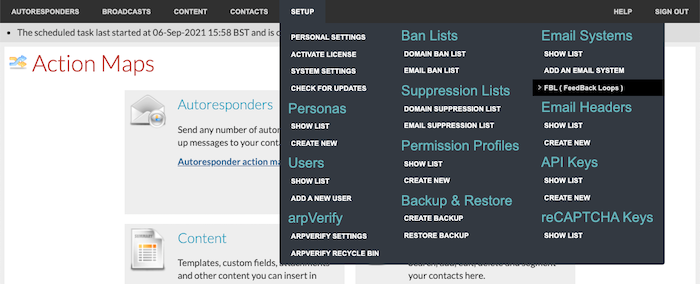
To manage your email systems, choose Setup / Email Systems / Show List from the menu bar:
Every autoresponder and broadcast that you create has a sending email system, and the email system you assign as the default is assigned to new autoresponders and broadcasts. This can be changed in the settings of individual autoresponders and broadcasts.
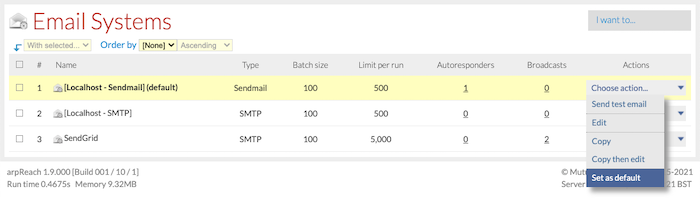
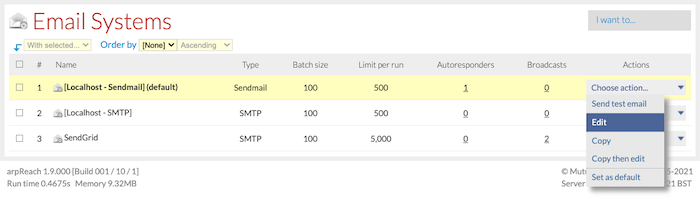
To set a default email system, choose Set as default from the actions column on the Email Systems list screen.
Adding or editing an email system
When adding or editing an email system, the settings are the same.
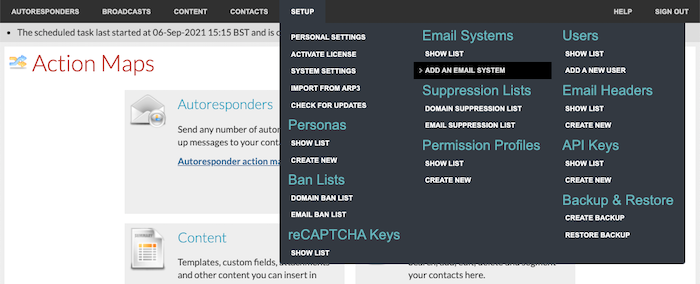
To add a new email system, choose Setup / Email Systems / Add an Email System from the menu bar:
… or choose Add an email system from the I Want To… menu on the Email Systems list screen:
To edit an existing email system, choose Edit from the Actions column on the Email Systems list screen:
Settings Tab
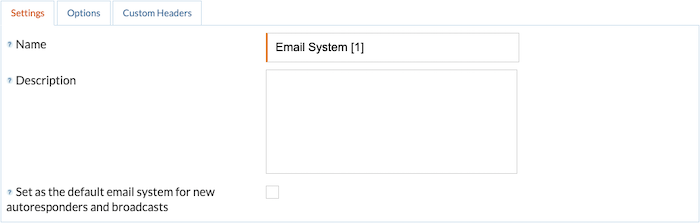
- Name – a unique name for the email system.
- Description – a description of the email system.
- Set as the default – check this box to use this email system as the default for new autoresponders and broadcasts. This can be changed in the settings of individual autoresponders and broadcasts.
Options Tab

Server Settings Section
- Sending method – choose the sending method from:
— Sendmail – local mail transport software on your web server such as Sendmail or clones like Exim. You need to provide the path to Sendmail which your web host can provide if you don’t know it.
— SMTP – a local or remote SMTP server. You need to provide the server details, including the login credentials, if the SMTP server requires them. The provider of the SMTP server can give you these details.
Advanced Section
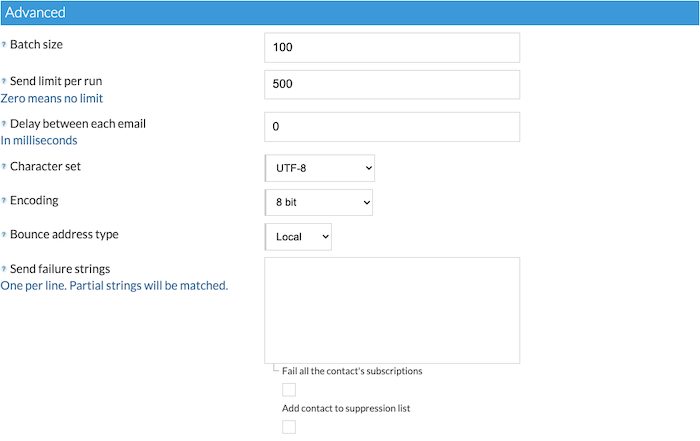
This section allows you to manage the speed at which you send emails and/or comply with your web host’s email sending limits.
- Batch size – enter the number of contacts that will be processed in each batch for this email system. A higher number requires more memory but requires fewer database reads/writes and is therefore faster. The default is 250 and this is recommended for most situations.
- Send limit per run – the number of emails that this email system may send during one run of the scheduled task. Use this to stay within your host’s sending limit if they have one.
- Delay between each email – the number of milliseconds between every email sent by this email system. Use this if your host requires a delay. It should be zero for most situations.
- Character set – choose the character set to send email in. The default is UTF-8 and this should be suitable for most situations.
- Bounce address type – choose how bounces will be handled for email sent by this email system.
— Local – This is the normal settings and bounces are processed locally as they arrive at the email address being monitored as set up in Setup / System Settings / System / Incoming Email.
— Remote – Use this setting if you use the services of a remote bounce processor. They will provide you with the server and login details to enter here. - Send failure strings – these are custom messages sent back by some SMTP providers at the time of sending if, for one reason or another, the SMTP provider cannot send the email. They should be added one per line, entering a few unique words from the middle of the received error (Note: Matches are case-sensitive.). You can react to these failures in two ways:
— Fail all the contact’s subscriptions – all the contact’s subscriptions will be flagged as failed.
— Add contact to suppression list – the contact’s email address will be added to the global suppression list so that no email will be sent.
Custom Headers Tab

- Add these custom email headers – choose the custom email headers to be added to every email sent by this email system.
How to comply with the sending limits of your server
Some servers set a limit on the number of emails that could be sent per hour.
arpReach is designed to manage such hosting limits, all you have to do is ask your web host what your hourly sending limit is and follow the guidelines below. Everything will run on autopilot from then on.
Let’s say your server only allows 500 emails to be sent per hour. The solution is to change some settings so that no more than 500 emails per hour get sent by arpReach. arpReach will then automatically manage sending 500 emails per hour until all due emails have gone out.
There are two settings to change to ensure that you comply with the limit:
- the run frequency of your scheduled task (cron job) for the arpReach script
- your email system’s Send limit per run setting
Scheduled task (cron job)
In the event your web host places limits on the volume of emails you can send per hour, we recommend setting the run frequency of your scheduled task (cron job) for the arpReach script to every 5 minutes. You can change this in your cPanel by changing its “minutes” setting to */5.
This means that the sending of emails will also occur every 5 minutes, whenever the arpReach script runs, totaling to 12 runs per hour (60 mins divided by 5 = 12).
Because you are limited to 500 emails per hour, you need to ensure that each of those runs sends no more than 41 emails.
Here’s a quick formula that you can use:
(hourly limit) / (no. of cron job runs in an hour)
500 / 12 = 41.67
Send limit per run (in arpReach)
Now, go to your email system’s settings in arpReach, then go to Options / Advanced and set the Send limit per run slightly lower than 41. For example, 38.
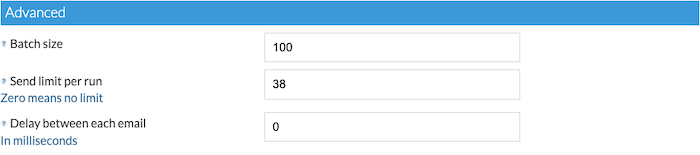
Setting the Send limit per run value slightly lower (i.e., 38 instead of 41) gives way to immediate/unscheduled messages (such as subscription confirmation emails and single emails triggered by actions).
Important Note: We’ve always been recommending setting the Delay between each email to zero (0), since setting it to a high number would not only slow the sending, but also cause timeouts. If there really is a need for a delay between each email, it should be set to a low number, and make sure that your server’s MySQL timeout can handle it.
#V2-exclusive: FBL (Feedback Loops)
In #V2, the email systems menu is accessed from the same location but has the additional FBL (Feedback loops) capability.
An FBL is a method that allows Internet Service Providers (ISPs) and third-party email service providers to notify senders of emails about problems with the emails they are sending to their contacts. The notifications received via an FBL are generally spam complaints, but they can also indicate other issues which vary from ISP to ISP.
To maintain a high sender reputation, it is essential that you do not send emails to contacts who no longer want them. When people complain, they do not always unsubscribe themselves from your list, but using the FBL feature allows you to automatically remove them from your autoresponders and also optionally add them to your ‘Do Not Contact’ list.
Currently, #V2 provides FBL processing for:
- Amazon SES/SNS
- Mailgun
- Mailjet
- Mandrill
- SendGrid
- Sendinblue
- SparkPost
To access and set up a new FBL, choose Setup / Email Systems / FBL (Feedback Loops) from the menu bar. This will bring you to the FBL (Feedback Loops) setups list screen:
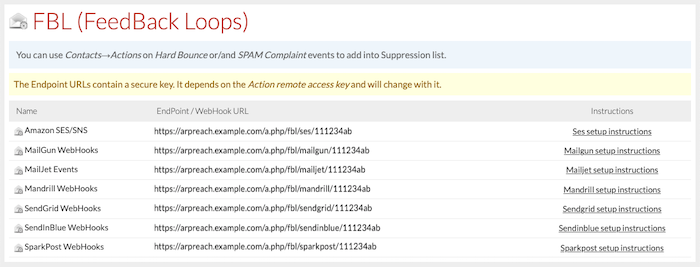
Each ESP will require you to set up your FBL in a slightly different way using the webhook URL links provided. Click on the setup instructions link for detailed instructions on how to set up your FBL. The instructions will open in a new window.