You can create as many subscription forms for each autoresponder as you need. Many form settings are held within arpReach instead of in fields in the HTML of the form. This allows you greater central control of forms, meaning you can change form settings without having to alter the form’s HTML on your websites.
“Many form settings are held within arpReach instead of the HTML of the form code to allow easier changes without editing code”
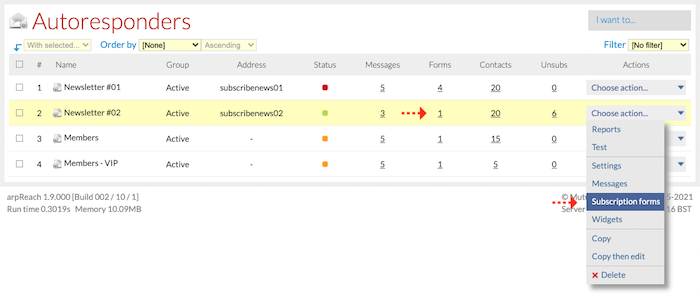
To manage an autoresponder’s subscription forms, go to the Autoresponders list screen and choose Subscription forms from the Choose action… drop-down menu or click the number in the Forms column.
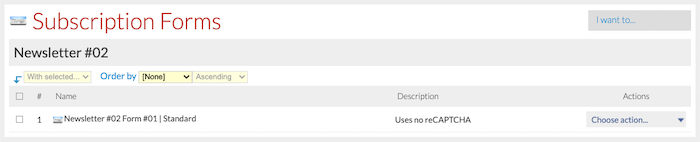
Once you have done so, this screen will appear:
Note that live forms must remain on the list. Do not delete forms that are currently accepting subscribers as they will become inoperable.
Creating / Editing a Subscription Form
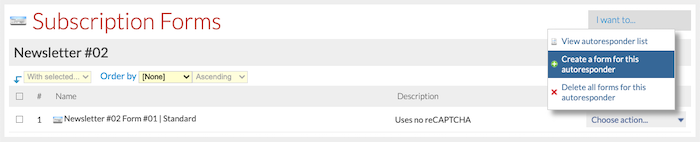
You can create a new subscription form by choosing Create a form for this autoresponder from the I want to… menu on the Subscription Forms list screen.
The options are the same for both creating a new form and editing an existing form.
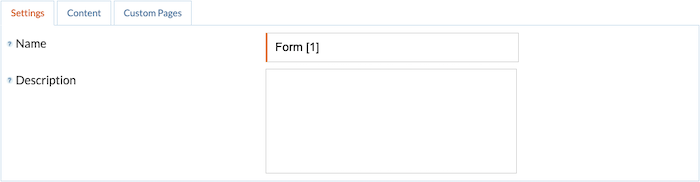
Settings Tab
Name – enter a unique name for the form.
Description – enter a description for form.
Content Tab
This is where you define the content of the form and the way it operates.
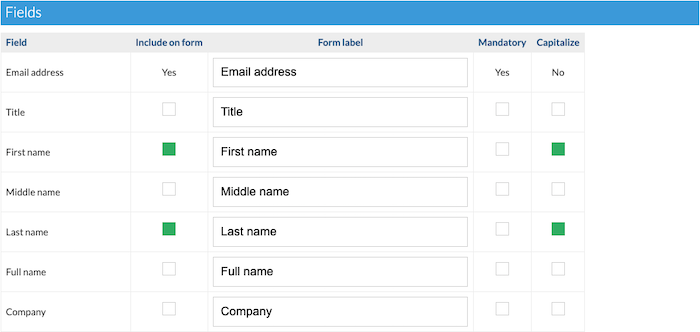
Fields Section
For every field you want to include on the form, check the box in the Include on form column. Enter a label for each field you have chosen. Check the Mandatory and Capitalize columns if required.
Custom fields that you have defined in Content / Custom Fields will also appear in the field list and can be included on the form.
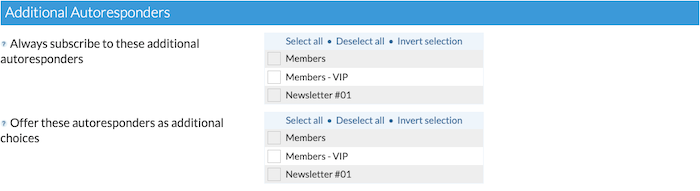
Additional Autoresponders Section
Here you can specify other autoresponders that this form will add a subscription to when a contact complete the form.
Always subscribe to these autoresponders – check this box to add the contact to these autoresponders invisibly.
Offer these autoresponders as additional choices – the form contains checkboxes to allow the contact to choose additional autoresponders that they wish to be subscribed to when they submit the form.
Use multi-autoresponders confirmation (#V2-exclusive) – check this box to send a single confirmation request email when the form includes additional autoresponders instead of sending a separate confirmation request for each autoresponder.
“Use captcha to ensure your forms are submitted by people and not by machines”
Tracking Section
Tracking tag to assign – choose a tracking tag from those defined in Contacts / Tracking Tags to be assigned to the form. When a contact completes the form, that tracking tag will be assigned to any subscriptions created by the form. Tracking tags are designed to allow you to monitor which forms are producing most subscriptions.
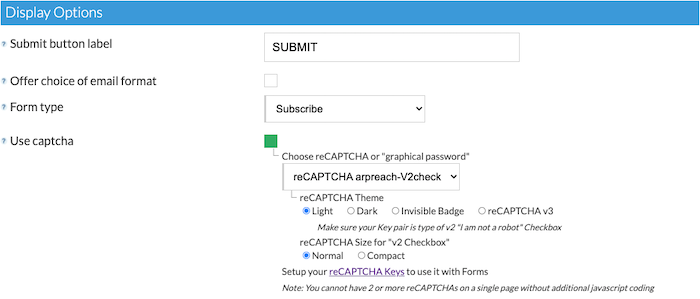
Display Options Section
Submit button label – enter text for the submit button.
Offer choice of email format – check this box if you wish to offer the new contact the choice of plain text and HTML email formats.
Form type – choose if this form will be used for subscriptions or unsubscriptions or whether the contact should be offered the choice as they are completing the form.
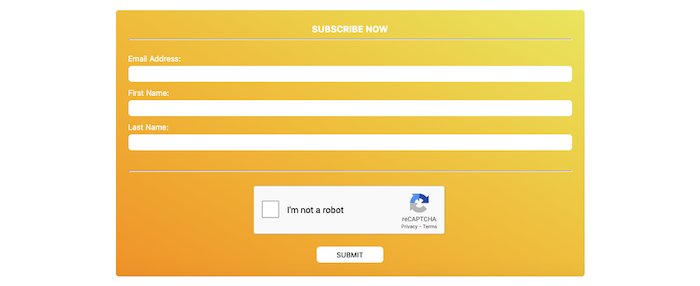
Use captcha – check this box to use Google reCAPTCHA on your form. This ensures that it is a human being completing the form and not a machine. reCAPTCHA V2 Checkbox, reCAPTCHA V2 Invisible Badge, and reCAPTCHA V3 are all supported.
The image above is an example of an arpReach subscription form with the reCAPTCHA V2 Checkbox (styled and formatted using an HTML editor).
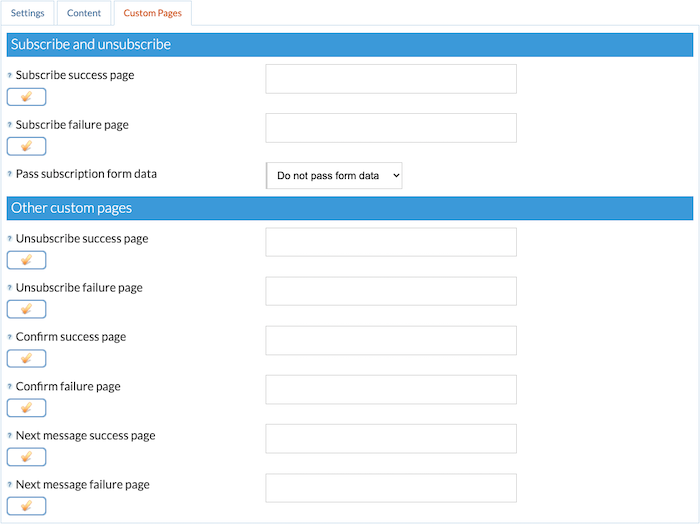
Custom Pages Tab
Custom pages are displayed to your contacts when they perform one of eight actions:
Subscribe successfully
Fail to subscribe successfully
Unsubscribe successfully
Fail to unsubscribe successfully
Confirm a subscription successfully
Fail to confirm a subscription successfully
Successfully request the next message in sequence
Fail to successfully request the next message in sequence
The following items in arpReach have custom page settings and the software will use them in the following precedence order:
Tracking tag custom pages
Subscription form custom pages
Autoresponder custom pages
Default system pages
You can also choose the method of passing form data to the subscribe success and failure pages:
None – No data is passed.
Request method GET – Data is passed to the custom page as a GET request. All form fields are available in the PHP $_GET variable.
Request method POST – Data is passed to the custom page as a POST request. All form fields are available in the PHP $_POST variable.
#V2-exclusive: Pass form data on custom unsubscribe pages
#V2 has the capability to also pass contact data on custom unsubscribe success and failure pages using the GET or POST methods.
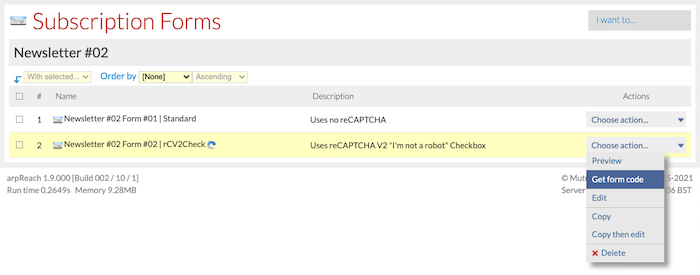
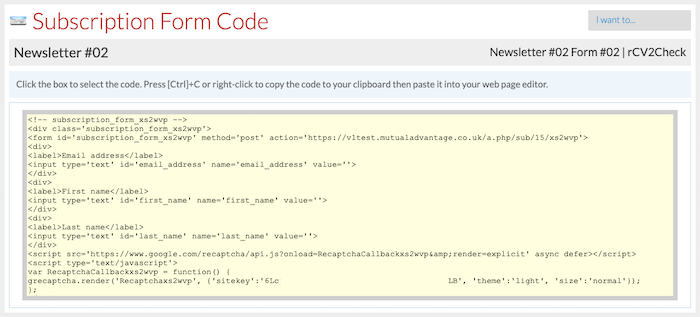
Generating Form Code
When you have created your form, you can generate its HTML by choosing Get form code from the Choose action… drop-down menu on the Subscription Forms list screen.
Click the form code to copy it to your clipboard, then paste the code into your preferred HTML editing software for styling.
As part of the styling process, the order of the fields can be changed and this will not cause a problem.
When you have finished styling the form in your preferred HTML editing software, copy the resultant HTML code and paste it into your web page.
You can send yourself a test of a single follow-up message (and/or any of its variants) or send yourself test copies of all the main follow-up messages of the autoresponder in one go.
This way you can check if their content and layout are as you intended before setting their final scheduling.
Testing a follow-up message
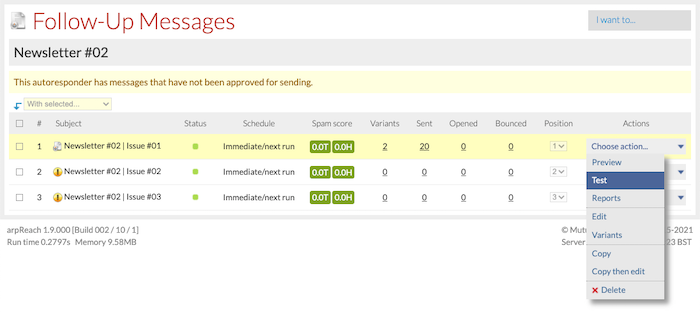
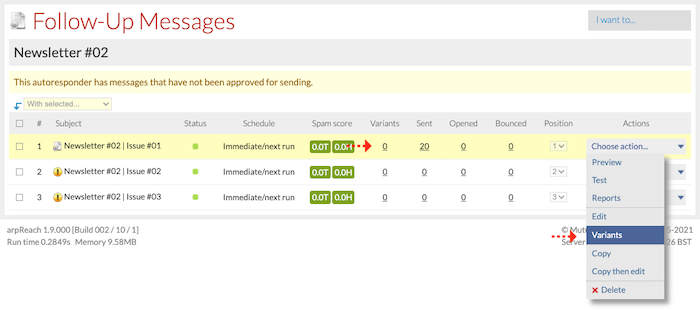
You can send yourself a test of a single follow-up message and any of its variants by choosing Test from the Choose action… drop-down menu on the Follow-Up Messages list screen:
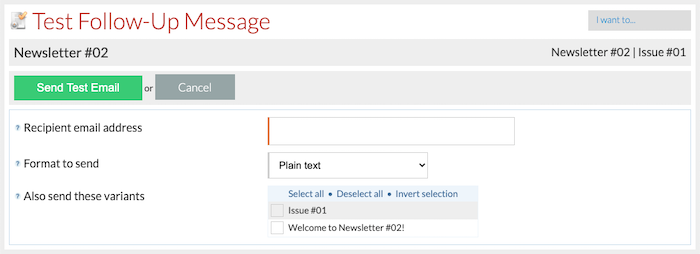
The information needed to initiate the test are the following:
Recipient email address – enter the email address where the test message should be sent.
Format to send – choose the format of the test message to be sent. You need to have entered a copy for the format chosen.
Also send these variants – if the message has variants, check the variant/s you also want to be sent.
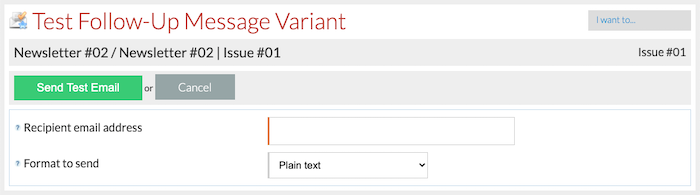
To test a variant separately, go to the Message Variants list screen and choose Test from the Choose action… drop-down menu:
All you need is to input the email address you want to send the test message to and choose the format to send:
Testing the entire follow-up sequence
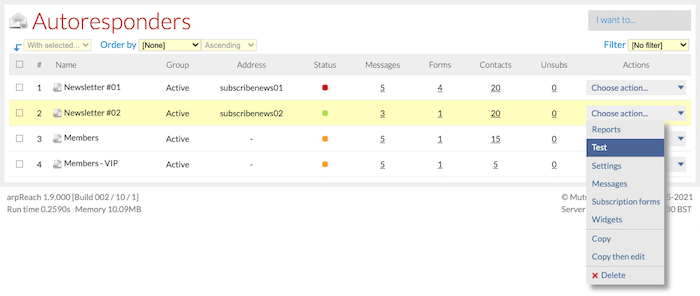
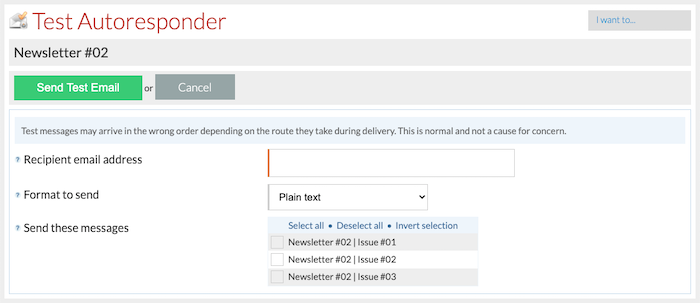
To send yourself copies of all the main (non-variant) messages in the follow-up sequence, choose Test from the Choose action… drop-down menu on the Autoresponders list screen:
The information needed to send the test messages are:
Recipient email address – enter the email address where the test messages should be sent to.
Format to send – choose the format of the test messages to be sent. You need to have entered a copy for the format chosen.
Send these messages – check the messages you want to be sent. Click the Select all link to send the entire follow-up sequence.
When testing the entire follow-up sequence, the messages may arrive in the wrong order depending on the route they take during delivery. This is normal and not a cause for concern.
Split testing is the process of sending two or more messages, as part of the same batch, to a small segment of your contacts. Each message has different content and each contact will only receive one message.
The aim of split testing is to maximize your ROI by discovering which email message performs better with a smaller segment of contacts. When you know which message has the better results (the winner) you send the winning message to the rest of your contacts.
You can split-test every follow-up message with any number of variants. This means you can test out different aspects of any message to compare their success.
How do you split-test?
First, you must create a follow-up message in your autoresponder (or broadcast message). This serves as the main or initial control message. You then create a variant of the main message which you will test against the control.
When a variant is first added to a follow-up message, it is an exact copy of the original message. It can then be tweaked to test every element of your message such as:
Subject line
Message format
Content
Layout
Attachments
“Some message variants will produce better results than others so you can adjust the rate at which each is sent at any time”
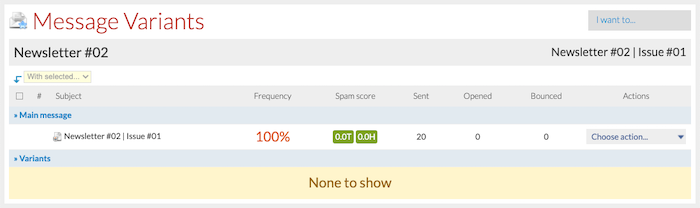
To create or manage the variants of a follow-up message, choose the Variants option on the Choose action… drop-down menu or click the number under the Variants column.
After doing so, the following screen appears:
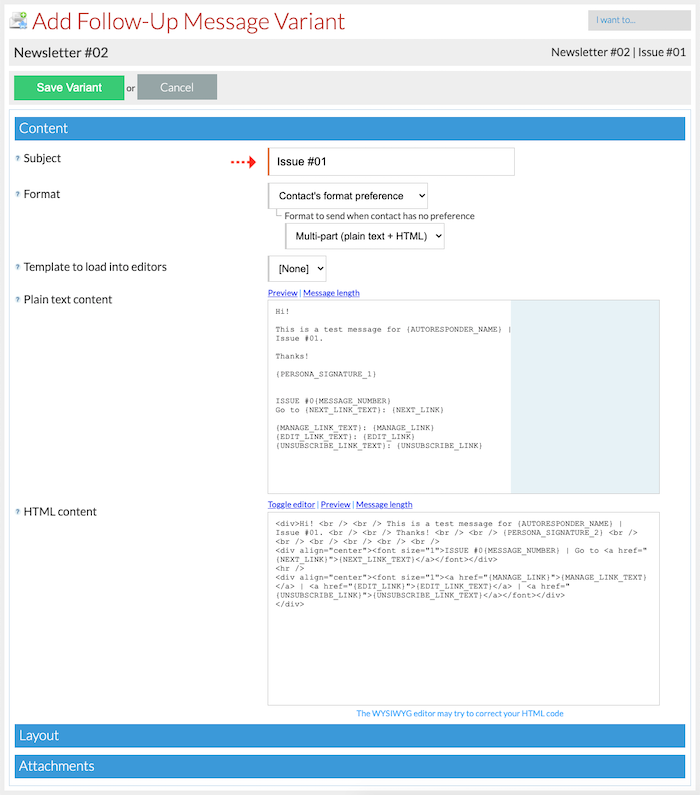
To create a split-test variant, choose Add a variant to this message on the I want to… drop-down menu.
This creates a copy of the original message and opens up the message editor for the variant you have just created. (In the image below, we changed the Subject line so we can split test the variant against the original.)
Once you have made your changes, click the Save Variant button.
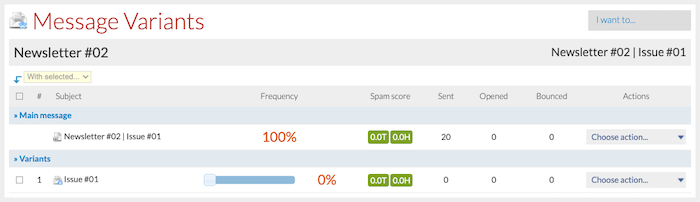
You will then be redirected back to the Message Variants list screen, which now shows the variant you just created.
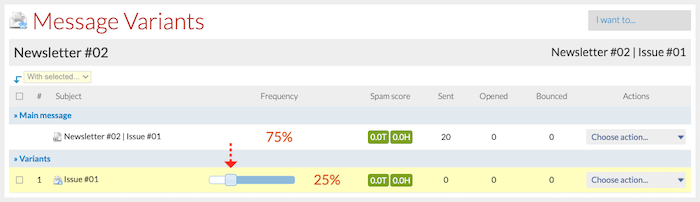
In the image below, take a look at the Frequency column.
Simply use the slider to change the percentage of contacts that will be receiving the variant.
The system decides at random which message will be sent to each contact during the sending process.
Each autoresponder you create can have any number of follow-up messages. arpReach will send them out over a period of time you define.
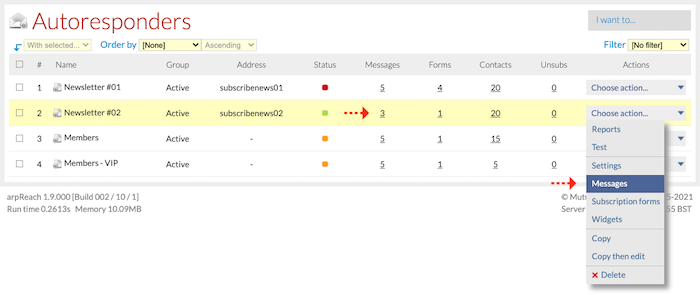
To manage an autoresponder’s messages, choose Messages from the Choose action… drop-down or click the number under the Messages column on the Autoresponders list screen.
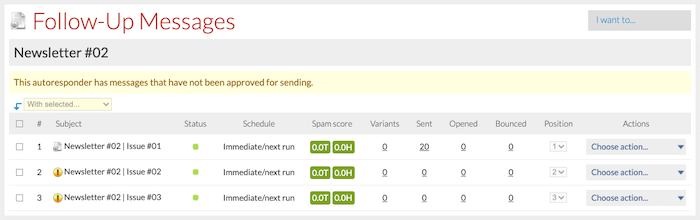
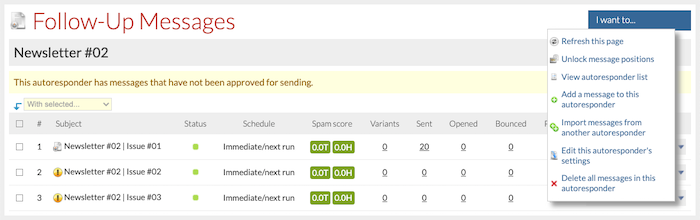
This shows the messages list for the autoresponder. The columns of information in the messages table are:
Subject – the subject of the message. (Note the exclamation to the left of the headline. This indicates that you have not approved your message to be sent. Once you have tested your message, you can approve the message by clicking Approve to send on the Choose action… drop-down menu.)
Status – the status of the message.
Schedule – when this message will be sent in relation to the previous message.
Spam score – a guideline spam score for the plain text (T) and HTML (H) content of the message. The threshold for a message to be classed as spam is five (5), but other factors such as your IP address will also be a factor. Treat this as a guide and not a definitive answer.
Variants – the number of split-test variants the message has. Click the number to view the variant list. You can test an unlimited number of variants.
Sent – the number of unique contacts who have been sent the message. Click the number to view those contacts.
Opened – the number of unique contacts who have opened the message. Click the number to view those contacts.
Bounced – the number of unique contacts who have bounced this message at least once. Click the number to view those contacts.
Position – the position of the message in the sequence. This option is grayed out unless Unlock message positions is selected from the I want to… drop-down menu. When message positions are unlocked, you can drag messages up and down the list to set their order. When done, select Lock message positions from the I want to… drop-down menu.
“You can change the order of follow-up messages by dragging them into place on the message list”
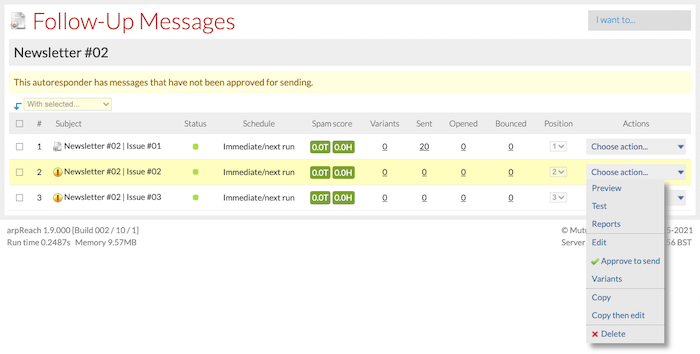
Under the Actions column, you have the Choose action… drop-down menu for each message in your sequence.
Using the Choose action… menu, you can:
Preview – preview the message in a popup window. Your browser needs to allow pop-ups for this to work. The preview window has tabs for the plain text and HTML versions of the message.
Test – send yourself a test version of the message and its split-test variants.
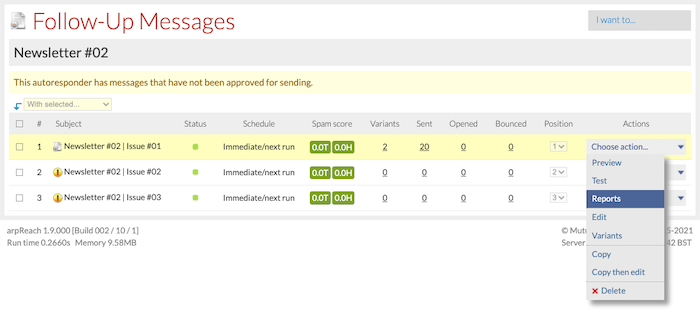
Reports – graphical reports on the open and bounce rates for the message and its split-test variants.
Edit – edit the message settings and content.
Variants – add and manage the split-test variants for the message.
Copy/Copy then edit – create a new message by copying the message’s settings and content.
Delete – delete a message from the follow-up sequence.
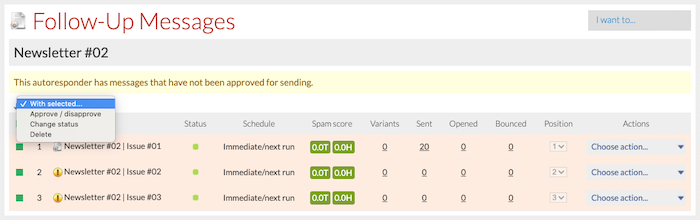
On the With selected… menu:
… you can approve or disapprove, change the status, and delete the messages selected.
On the I want to… drop-down menu, you can:
Refresh the page to update send, open, and bounce counts.
Unlock the message positions to change their order using the Position column or dragging.
View the autoresponder list.
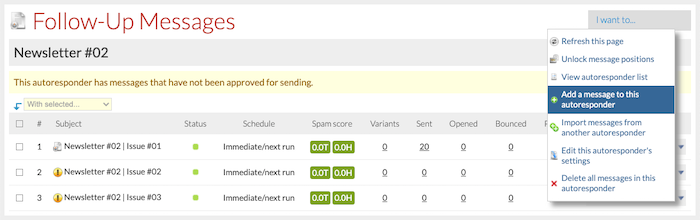
Add a new message to the follow-up sequence.
Import messages from another autoresponder in your system.
Edit the autoresponder’s settings.
Delete all the messages in the autoresponder’s follow-up sequence.
Using the I want to… menu, select Add a message to this autoresponder.
When adding or editing a follow-up message, the settings are the same.
The Add Follow-Up Message screen is split up into three tabs for easy management, which are:
Settings
Message
RSS Feed
The Settings Tab
The Settings tab has three sections: When to send, Day, time and duplicate restrictions, and Tracking and reporting.
When to send Section
Status – the status of the message. The options are: — Live – the message is live and being sent as required. You will need to make your messages live when you are ready to send them. — Inactive and skip (default) – the message is not live and subscribers reaching this point will jump over it and continue. — Inactive and block – the message is not live and subscribers reaching this point will stop and not receive any more messages.
When to send – this is where you set when this message should be sent. The options are: — Immediate/next run – the message will be sent as soon as possible. For form, email, and admin system subscriptions, this means immediately. For imported data, it means when the scheduled task next runs. — Interval in hours/days – the number of hours/days since the previous message before this one may be sent. The message will be sent as soon as possible after the interval by the scheduled task.
For new subscriptions where no previous messages have been sent, this interval is calculated from the date and time of subscription to the autoresponder. — Monday to Sunday – the message will be sent on the next occurrence of the day of the week specified, assuming the scheduled task is running on that day.
Approved for sending – check this box to approve this message for sending. Only administrators and users with the correct permissions can approve messages. See Permission Profiles for more information.
Day, time and duplicate restrictions Section
This section allows you to control the days and times that the message may be sent. For example, you may wish to prevent sending the message during the night or at weekends.
“You can avoid sending messages at weekends and during the night”
Can only send on these days – check the days that the message may be sent. Use this to avoid certain days such as weekends.
Earliest time to send – choose the earliest time that this message may be sent. Use this to avoid sending too early in the morning.
Latest time to send – choose the latest time that this message may be sent. Use this to avoid sending too late at night.
Never allow to be resent – check this box to ensure that a contact is never sent this follow-up message more than once, even if the order of messages in the autoresponder is changed.
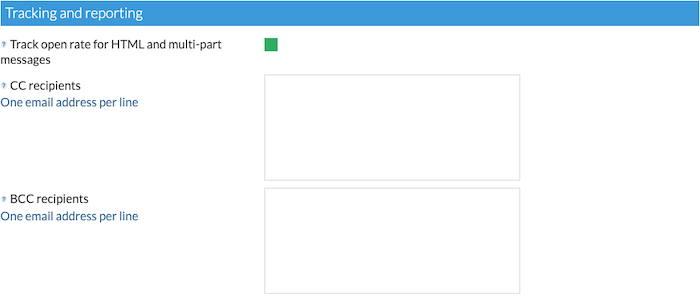
Tracking and reporting Section
Track open rate for HTML and multi-part messages – check this box to track the open rate for HTML and multi-part messages. Email technology does not allow tracking to work for plain text messages.
CC recipients – enter a list of email addresses (one per line) that will be CC’d on this message every time it is sent to a contact. Note that all recipients, including the contact, will see the CC’d list.
BCC recipients – enter a list of email addresses (one per line) that will be BCC’d on this message every time it is sent to a contact. Recipients, including the contact, will not see the BCC’d list.
The Message Tab
The Message tab is split into three sections for easy management:
Content
Layout
Attachments
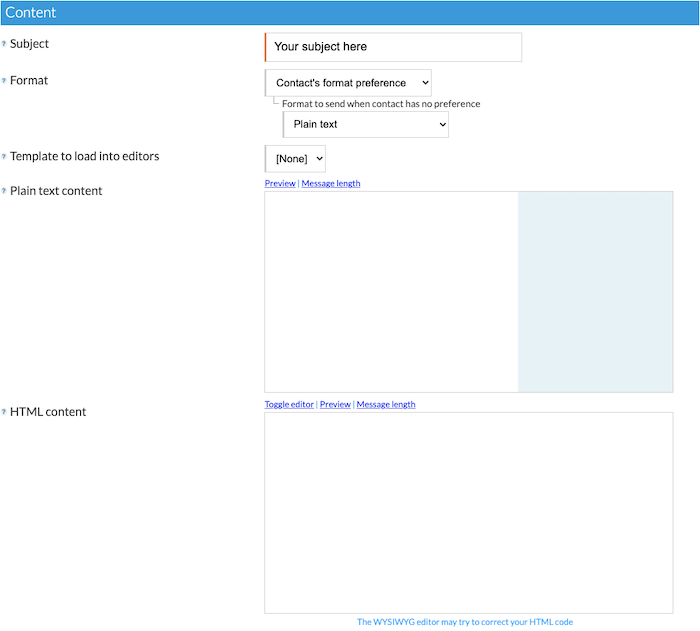
Content Section
Subject – enter the message subject line.
Format – choose the format of the message to be sent. Your options are: — Plain text – Send only the plain text version of the follow-up message. You need to enter plain text copy in the Plain text content box. — HTML – Send only the HTML version of the follow-up message. You need to enter HTML copy in the HTML content box. — Multi-part (Plain text + HTML)*Recommended* – Send both the plain text and HTML versions of the follow-up message, combined into a single multi-part message. You need to enter both plain text and HTML copies.
Template to load into editors – choose a template to load into the plain text and HTML editors from your library of pre-created templates (as defined in Content / Templates). Note: You must select the template you want to use before adding in content. If you add content and select a template afterward your content will be lost as the new template will overwrite everything in the content boxes.
Plain text content – enter the plain text copy of the follow-up message.
HTML content – enter the HTML copy of the follow-up message. Click the Toggle Editor link for a full HTML editor.
Add personalisation content tags (link) – clicking this will open a new window that contains all of the available standard shortcode tags that you can copy and paste into your content boxes to personalize your messages.
“Click the Toggle Editor link to use the full HTML editor. It has a full-screen button for easier editing”
Tip! Write your message out in a text app (e.g., Notepad) before adding it into the content boxes. For security reasons, some servers will automatically log you out of arpReach after a specific session length and if you have not saved your writing you will lose all of your work. This is a PHP server setting and not something that can be changed or controlled by arpReach.
Layout Section
Add autoresponder’s header – check this box to add the autoresponder’s header before the start of the message contained in the content boxes.
Add autoresponder’s footer – check this box to add the autoresponder’s footer after the end of the message contained in the content boxes.
Include in autoresponder’s RSS feed – check this box to include this message in the RSS feed for this autoresponder. Using this facility, you can control which of the autoresponder’s messages appear in the RSS feed and which are sent by email only.
Once you have added your first message, you will be taken back to the Follow-Up Messages list screen.
In this section, we discover how to set up your autoresponders in arpReach. Only once we have set up the autoresponder can we add our campaign messages and sequences, which we cover in the next section.
“Use autoresponders to create email campaigns to follow up with your prospects and contacts on auto-pilot”
Taking the time to look at and understand your options (and some of the available automation options) will help you increase your contact retention and build trust with your subscribers.
You have many basic and customization options available to you. Why just “do” when with a little extra effort you can do to impress 😉
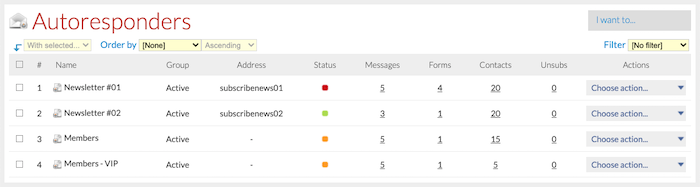
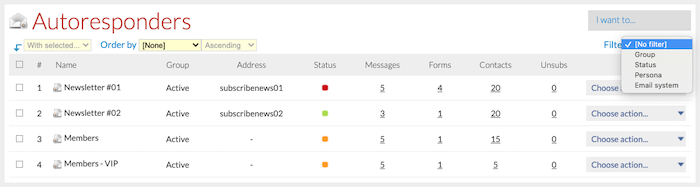
Autoresponders list screen
Choose Autoresponders / Show List from the menu bar to show your list of autoresponders.
The columns in the table are:
Name – the unique name you have given this autoresponder.
Group – the group (if any) to which this autoresponder belongs.
Address – the incoming email address (if any) for this autoresponder which can be used to subscribe or unsubscribe by email.
Status – the status of this autoresponder. — Live – accepting new subscriptions and sending messages. — Disabled – not accepting new subscriptions and not sending messages. — Sending paused – accepting new subscriptions but not sending messages. — Prevent new subscriptions – not accepting subscriptions but sending messages to existing subscribers.
Messages – the number of messages in the autoresponder’s follow-up sequence. Click on this number to view the messages list.
Forms – the number of subscription forms you have created for this autoresponder. Click on this number to view the forms list.
Contacts – the number of unique contacts who are subscribed to this autoresponder, regardless of their subscription status. Multiple subscriptions by individual contacts are not counted. Click this number to view the contacts who are subscribed to this autoresponder.
Unsubs – the numbers of contacts who unsubscribed to this autoresponder. Click this number to view the contacts who unsubscribed to this autoresponder.
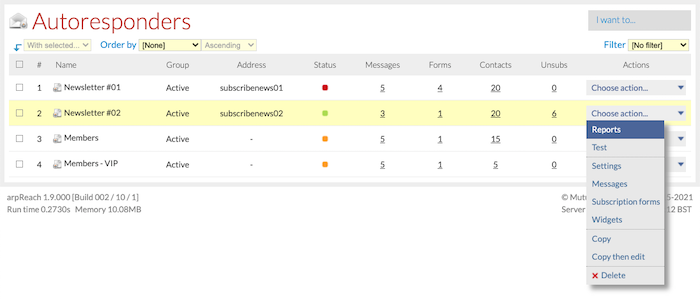
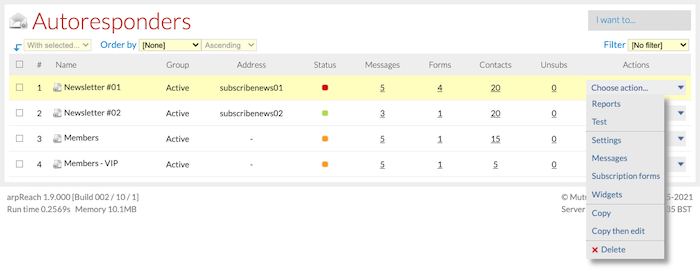
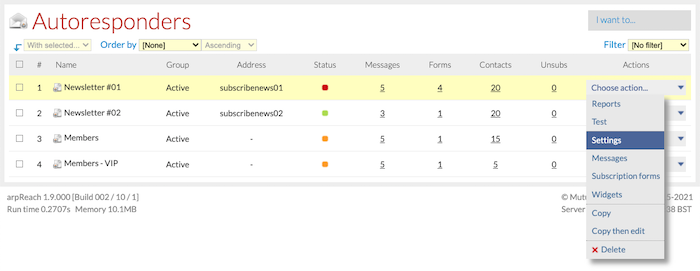
On the Choose action… menu for each autoresponder, you can:
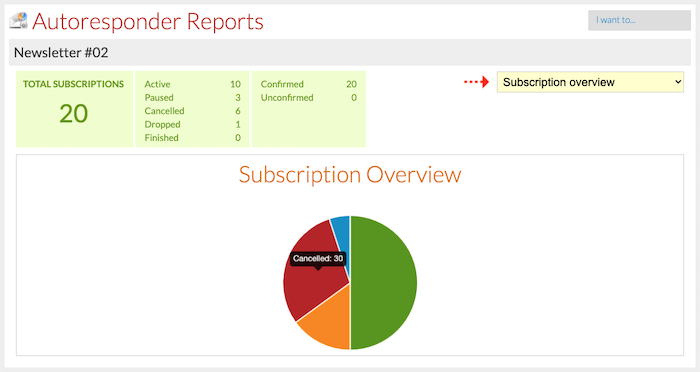
Reports – view subscription reports.
Test – send yourself test follow-up messages.
Settings – edit its settings.
Messages – view and manage its follow-up messages.
Subscription forms – view and manage its subscription forms.
Widgets – get HTML code to display a small image on your website showing how many subscribers an autoresponder has.
Copy/Copy then Edit – copy this autoresponder and all its follow-up messages.
Delete – delete this autoresponder and all its follow-up messages.
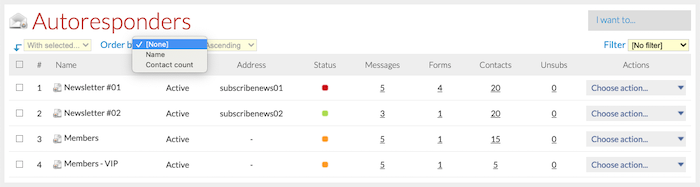
You can sort your autoresponder list by name and contact count using the Order by drop-down menu.
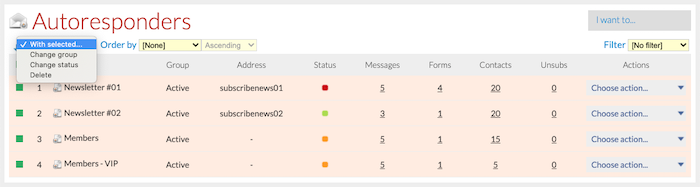
On the Autoresponders list screen, the With Selected… drop-down menu allows you to:
Change the group of the selected autoresponders
Change the status of the selected autoresponders
Delete the selected autoresponders
The Filter drop-down menu allows you to filter the list by:
Autoresponder group
Status
Persona
Email system
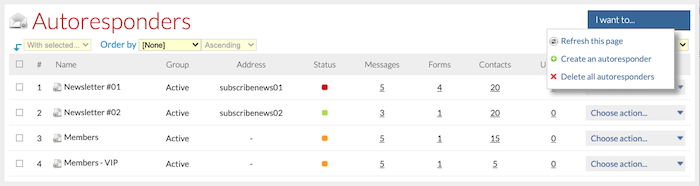
The I Want To… menu has options to create a new autoresponder and to delete all autoresponders.
Setting up an autoresponder
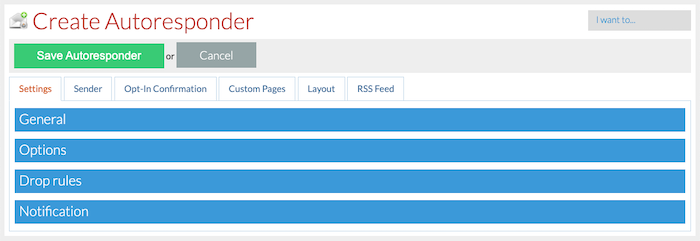
To create a new autoresponder campaign, go to Autoresponders / Create New:
When creating a new autoresponder or editing an existing one, the settings screens are the same.
To edit an existing autoresponder, go to the Autoresponders / Show List, locate the autoresponder, and choose Settings from the Choose action… drop-down menu.
The settings are spread across five (5) tabs and each tab will have one or more sections/panels. Each section has input fields that you will need to fill in or make choices about. While it may look daunting, it is simple, and you only need to complete the workflow when you create a new autoresponder campaign.
The tabs are:
Settings
Sender
Opt-In Confirmation
Custom Pages
Layout
RSS Feed
Settings Tab
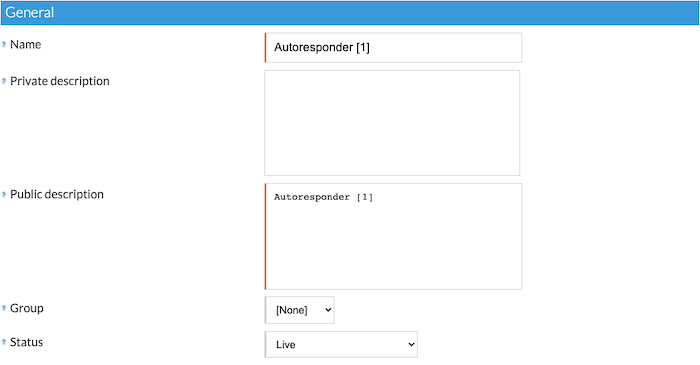
General Section
Name – the unique name of the autoresponder.
Private description – your private description of the autoresponder. This is not published.
Public description – the published description of the autoresponder. This description may be displayed to contacts on their manage subscriptions page. Make sure you identify your autoresponder so that your contacts remember what they signed up for.
Group – the autoresponder group (if any) to which the autoresponder belongs. None is the default.
Status – the current status of the autoresponder. The available options are: — Live – new subscriptions will be accepted and due follow-up messages will be sent. — Disabled – no new subscriptions will be accepted and no due follow-up messages will be sent. — Sending paused – new subscriptions will be accepted but no due follow-up messages will be sent. — Prevent new subscriptions – no new subscriptions will be accepted but due follow-up messages will be sent.
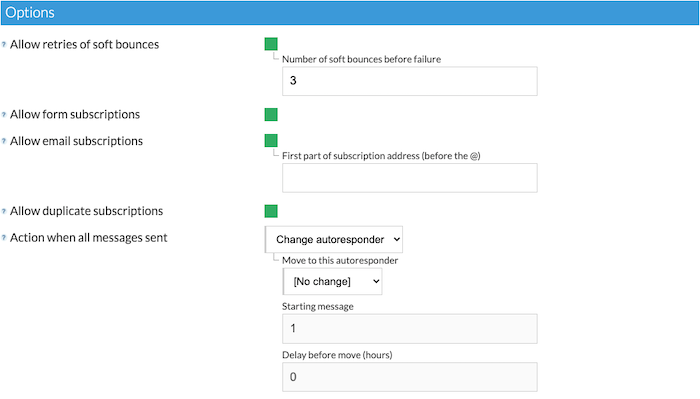
Options Section
Allow retries of soft bounces – check this to resend follow-up messages that soft-bounce and set the number of soft bounces allowed before the subscription is flagged as failed. Three (3) is the default.
Allow form subscriptions – check this box to allow contacts to subscribe through a subscription form on a website. Most people will want this option available.
Allow email subscriptions – check this box to allow contacts to subscribe by sending a blank email to the subscription address. Contacts can also unsubscribe by entering “unsubscribe”, “remove”, “leave”, “stop” or “delete” in the subject line of the email. For example, if you want info@example.com to trigger a subscription, enter info as the First part of the subscription address. Subscriptions can be accepted using the To: or CC: fields, but not the BCC: field. You can use forwarders from other domains to trigger subscriptions. Only the first part of the email address needs to match. Accepting subscriptions by email requires that the scheduled task is correctly set up to monitor the email address where emailed subscriptions arrive.
Allow duplicate subscriptions – check this box to allow one contact to subscribe to this autoresponder multiple times. An email address can only appear once in the contact list but each contact may have multiple subscriptions to each autoresponder.
Action when all messages sent – choose the action to happen when the contact reaches the end of the autoresponder’s follow-up sequence. The available options are: — Set to finished – the status of the subscription will be changed to Finished. If new messages are added to the sequence, they will not be sent to the contact. — Remain active – the status of the subscription will remain as Active. If new messages are added to the sequence, the contact will be sent the new messages (this is recommended in most cases). — Change autoresponder – move the contact’s subscription to a new autoresponder. Choose the autoresponder the contact will be moved to, the starting message number, and the delay before the move happens. With this option, the original subscription no longer exists, so the contact will no longer receive any new messages added to the original autoresponder.
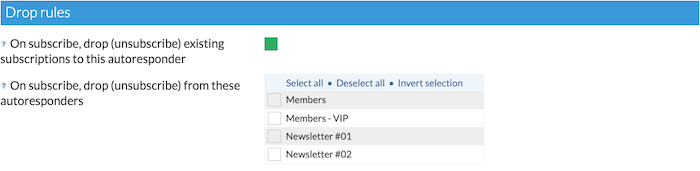
Drop rules Section
On subscribe, drop (unsubscribe) existing subscriptions to this autoresponder – ensures that a contact’s existing subscription to the autoresponder is cancelled when a new one is created. You would use this option to stop a subscriber from receiving multiple emails from the same autoresponder (e.g., messages 1 and 5 and 7 in potentially the same week or day). (See also Allow duplicate subscriptions above)
On subscribe, drop from these autoresponders – choose which subscriptions to other autoresponders will be cancelled when a new subscription to this autoresponder is created.
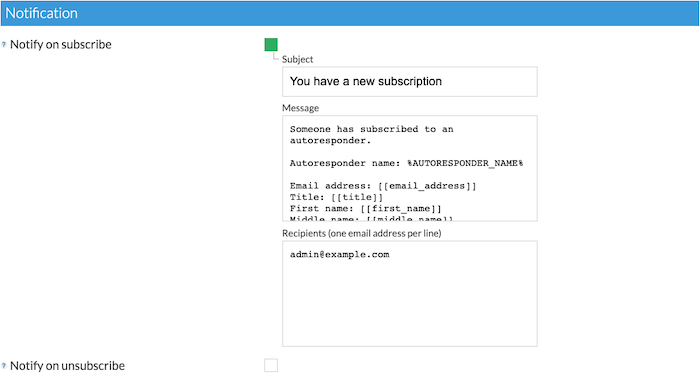
Notification Section
Notify on subscribe – choose this option to send a notification email when someone subscribes to the autoresponder. — Subject – the subject of the subscribe notification email. — Message – the content of the subscribe notification email. — Recipients – email addresses of people that will be sent the subscribe notification emails, entered one email address per line.
— Reply-To: subscriber [[email_address]] (#V2-exclusive) – check this box to add a Reply-To: header with the subscriber’s email address to subscribe notification emails.
Notify on unsubscribe – choose this option to send a notification email when someone unsubscribes from the autoresponder. — Subject – the subject of the unsubscribe notification email. — Message – the content of the unsubscribe notification email. — Recipients – email addresses of people that will be sent the unsubscribe notification emails, entered one email address per line.
The following tags are available for you to use in your notification emails:
%AUTORESPONDER_NAME% - to include the name of the autoresponder.
%EMAIL_ADDRESS% - to include the email address of the contact
%FULL_NAME% - to include the full name of the contact if the full name has been captured
#V2-exclusive: Custom fields in the subject line and recipients list
With #V2, you can use custom fields in the notification email subject line and recipients list.
For example, you may want to send a copy of the subscribe notification emails to your partners or referrers. In the Recipients list, you can enter:
admin@example.com
[[custom_referrer_email]]
… given that you have a custom field for referrer_email set in Content / Custom Fields / Show List.
#V2-exclusive: Persona as recipients
You can also add the following persona email address tag formats in the notification recipients list:
This allows you to send the notification emails to the email addresses related to the persona you’ve set in the autoresponder’s Sender / Persona settings.
Sender Tab
Email System Section
Send messages with this email system – from the drop-down choose an email system that will be used to send all messages from this autoresponder, including follow-ups and confirmation requests. Email systems are set-up and managed in Setup / Email Systems.
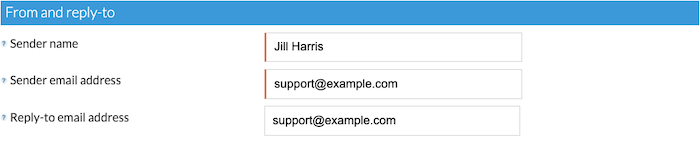
From and Reply-To Section
Sender name – enter the “from” name of the sender of emails from this autoresponder.
Sender email address – enter the “from” email address of the sender of emails from this autoresponder.
Reply-to email address – enter the “reply-to” email address of the sender of emails from this autoresponder.
Persona Section
Send with this persona – choose a persona to be used to personalize the messages sent by this autoresponder. This allows you to automatically populate your templates or emails with content such as name and company name, providing it has been added to the person record. Personas are managed in Setup / Personas. Persona tags that you can insert to include information from the selected persona are listed on the Persona Tags page.
Opt-In Confirmation Tab
Confirmation type – choose the type of subscription confirmation to be used for this autoresponder. This determines whether or not new subscribers will be required to confirm their subscription when they subscribe.The options you have are: – No confirmation required – New subscribers are not required to confirm their subscription and will therefore start to receive the autoresponder’s follow-up messages. – Use system confirmation email – New subscribers will be sent the system confirmation email as defined in Setup / System Settings / Opt-In Confirmation . The contact will need to click the “confirm” link in their confirmation email before they will receive any follow-up messages. (Also known as double opt-in.) – Use custom confirmation email – New subscribers will be sent the custom confirmation email defined on this screen. Ensure that the email contains the tag {CONFIRM_LINK} as this will generate the link that the contact must click to confirm their subscription. No follow-up messages will be sent until the contact has confirmed their subscription. (Also known as double opt-in.) For the custom confirmation type, you need to set the format to be sent, the subject and the plain text and HTML messages as appropriate. For HTML messages, click the Toggle editor link to view the HTML editor or enter raw HTML produced in an offline editor.
“Many screens use the HTML editor – click the toggle editor link to switch the editor on and off”
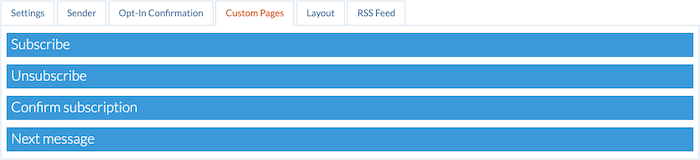
Custom Pages Tab
Custom pages are the web pages your contacts will be taken to and see when they perform one of eight actions:
Subscribe successfully
Fail to subscribe successfully
Unsubscribe successfully
Fail to unsubscribe successfully
Confirm a subscription successfully
Fail to confirm a subscription successfully
Successfully request the next message in sequence
Fail to successfully request the next message in sequence
“The precedence order for custom pages is tracking tag then subscription form then autoresponder”
Important: The following items in arpReach have custom page settings and the software will use them in the following precedence order:
Tracking tag custom pages
Subscription form custom pages
Autoresponder custom pages
Default system pages
Example 1 A contact subscribes via a subscription form that has a tracking tag in its settings and that tracking tag has custom pages defined in its settings, then the tracking tag’s custom pages will be used for that contact.
Example 2 A contact subscribes via a subscription form that has no tracking tag assigned to it but the subscription form has custom pages defined in its settings – the form’s custom pages will be used for that contact.
Example 3 A contact subscribes by email to an autoresponder that has custom pages defined in its settings. Those custom pages will be used for that contact.
Example 4 A contact subscribes by email to an autoresponder that has no custom pages defined in its settings. The system default pages will be used for that contact.
Each of the four sections has two options for you to add a URL into. Use is optional, but highly recommended.
Success page – Enter the URL of the page to be displayed when a contact successfully completes the action required.
Failure page – Enter the URL of the page to be displayed when an error results from a contact attempting to complete an action.
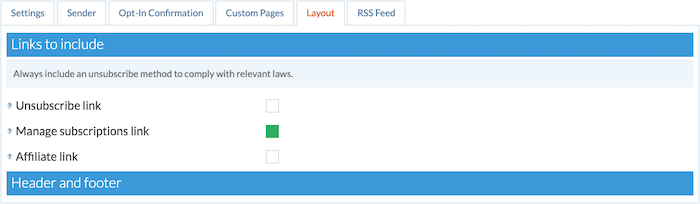
Layout Tab
The options in the layout tab define some general layout settings that will be applied to all follow-up messages in the autoresponder.
Links To Include Section
Unsubscribe link – this will append an unsubscribe link to all messages in the autoresponder. The unsubscribe link applies only to this autoresponder and no other subscriptions are affected.
Manage subscriptions link – append a link that allows the contact to manage all their subscriptions on one screen.
Affiliate link – This will automatically append your arpReach affiliate link to all follow-up messages in the autoresponder. This can be managed from Setup / System Settings / Affiliate Program.
Header and Footer Section
Here you can enter plain text and HTML versions of a header and footer to be used in conjunction with the templates you create within arpReach.
When defining each follow-up message in the autoresponder, you have the option of including the autoresponder’s header and/or footer. The software will automatically use the plain text or HTML version of the header or footer depending on the type of message being sent to the contact.
Headers and footers from autoresponders can also be added to broadcasts. In a broadcast’s settings, there is a drop-down where you can choose which autoresponder’s header and/or footer to use.
Tip!
Create an autoresponder group called “Templates” to specifically use with your broadcast templates.
Create an autoresponder called “My Template” (or whatever you think is appropriate).
Set the autoresponder status (Autoresponder / Settings / General) to Disabled.
Ignore all other tabs and settings except for Layout / Header and footer.
Add your custom header and footer for each of your broadcast templates. This puts all of your template headers and footers in one, easy to edit place. This also ensures that if you change a live autoresponder’s header and/or footer, your broadcast template will still look the same. Yes, it’s a bit more work, but it will save you time and effort in the long run!
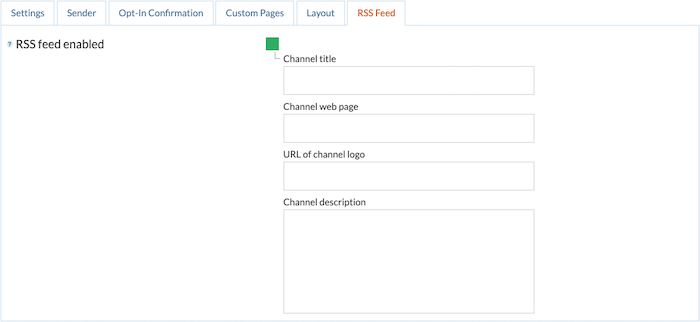
RSS Feed Tab
You can allow your contact to receive their follow-up messages into an RSS feed, as well as by email. To allow this, check the RSS feed enabled box and enter the RSS channel settings for the autoresponder. To disable this feature, uncheck the box.
Channel title – enter the title for the RSS feed channel. If left blank, the autoresponder’s public description is used.
Channel web page – enter the URL of the web page for the RSS feed channel.
URL of channel logo – enter the URL of your RSS feed channel’s logo. Max size is 144 px wide x 400 px high. Default size is 88 px wide x 31 px high.
Channel description – enter the description for the RSS feed channel. This can contain HTML. If left blank, the autoresponder’s public description is used.
You can inform your subscriber of the URL of their RSS feed by including the tag {RSS_FEED_LINK} in follow-up messages. Note that this tag does not work in broadcasts because broadcasts are not specific to individual autoresponders.
Use autoresponder groups to keep related autoresponders together.
Let’s say your business sells pet foods. You can create autoresponder groups for “Cats” and “Dogs”. Over time, as your product range grows, you can create autoresponders (or campaigns) for each product and assign each autoresponder to the appropriate group (i.e., Cat product campaigns would be grouped in “Cats” so you can easily find and work on them).
Other examples could be the following groups:
Product training
Sales sequences
Affiliate training
Prospect warm-up
When you have autoresponders in a group, you can easily manage those autoresponders by filtering your autoresponder list to show only the autoresponders in that group.
Managing your autoresponder groups
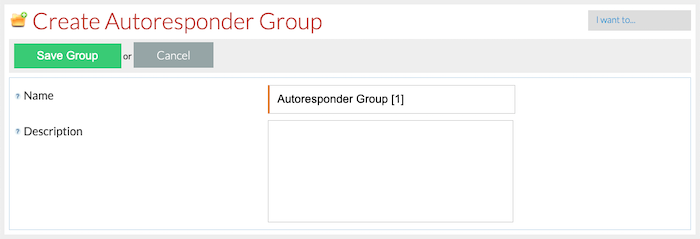
To add a new autoresponder group, go to Autoresponders / Autoresponder Groups / Create New.
Autoresponder groups are very easy to manage because they only have two settings — Name and Description. For any autoresponder group, both of these settings can be changed at any time without affecting the autoresponders in the group.
Name – the name for the autoresponder group. Every autoresponder group has its own unique name for easy management.
Description – the description for the autoresponder group. This description is never displayed to contacts.
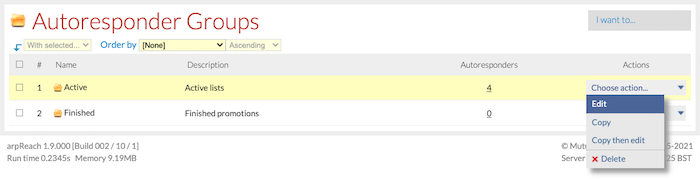
To view your list of autoresponder groups, go to Autoresponders / Autoresponder Groups / Show List.
The number of autoresponders in each group is shown in the Autoresponders column of the table. You can click the number to jump to your autoresponders list with only the autoresponders in that group showing.
You can sort this list by name, description, and autoresponder count using the Order by drop-down menu.
The I want to… menu has options to create a new group and to delete all groups. Deleting all groups does not delete the autoresponders in those groups.
The With selected… menu allows you to choose multiple groups and delete them all at the same time.
The Choose action… drop-down menu for each group has options to:
Edit – to edit the autoresponder group.
Copy – to copy the autoresponder group. Copying a group only copies its name and description but not the autoresponders in the original group.
Copy then edit – to copy the autoresponder group and the switch to the edit screen so its properties can be changed. Copying a group only copies its name and description but not the autoresponders in the original group.
Delete – to delete the autoresponder group. Deleting a group does not delete the autoresponders in that group.
“Use autoresponder groups to keep related autoresponders together for easy management”
Historically, in 2004, The Internet Society laid out the Official Protocol Standards, Recommendations for Automatic Responses to Electronic Mail (RFC 3834). These are a set of rules for software that automatically responded to incoming electronic mail messages with a prewritten email response. These included single “out of the office” or “on vacation” type response generators and mail filtering software. Since then, the scope of what we now call or think of as an autoresponder has grown to encompass a much wider range of capabilities related to an email marketing tool.
These days, when people talk about autoresponders, at a basic level, we think about the capability to send pre-written sequences of personalized follow-up email messages. The messages can be sent to one or more contacts on auto-pilot over a specified timeframe. Autoresponders are, therefore, a core component of your email marketing campaigns. arpReach makes it easy to set up and run multiple campaigns.
arpReach allows you to create any number of autoresponders (or campaigns) and each of those autoresponders can have any number of follow-up messages in its sequence.
Each contact who is subscribed to an autoresponder can be at any point in its message sequence. arpReach manages the sending of your follow-up messages, ensuring that each contact receives the sequence of emails over the time period you have specified.
For ease of management, arpReach allows you to keep related autoresponders (or campaigns) together in Autoresponder Groups.
In this section, you will discover how to set up your autoresponder campaign message sequences.
Important Note: Autoresponders are not used for sending one-off messages. While a one-off promotional email can be sent to the *contacts* of an autoresponder, you should send your one-off promotional emails using arpReach’s broadcast capability.
To view the autoresponders action map, click Autoresponders on the menu bar.
The following sections will help you learn how to get the best from arpReach: