Add videos to messages

How do I embed a video to my message?

Adding videos to your messages allows you to get your messages across more quickly and easily, specially in this day and age, where people are more inclined to watch a video than read a lengthy message.

This is how to do it:

If you are technically savvy enough and comfortable with HTML, you can look into embedding your video to your message using HTML5.

Just like with adding an image, your video needs to be “sourced” on any platform that hosts videos and allows them to be embedded in emails.

It is important to note though that playback will still depend on whether the email client/service provider of the recipient supports it.

The best alternative, and our recommendation, is to use image hyperlinks rather than embedding the videos. An image hyperlink is an image/picture that links to the video when clicked by the reader. The image, in this case, would normally be expected to look like it was the thumbnail for the video.

Helpful resources:

https://www.w3schools.com/html/html5_video.asp
https://www.w3schools.com/html/html_images.asp

Add images to messages

How do I add an image to my message?

Adding images to your messages adds visual impact and may result to a higher engagement rate, since people in general respond more to images as compared to messages that are in pure text.

This is how to do it:

You can add an image to your message by using the <img> tag. For example:

<img src='http://directpathoftheimagehere.com'>

The image is not technically inserted or embedded (as an in-line attachment) to your message. The <img> tag just creates a holding space for the referenced image.

To “source” an image, upload the image on your server (or any platform that stores images) and use the direct link/URL of the image as your image source (src).

Helpful resources:

https://www.w3schools.com/tags/tag_img.asp
https://www.w3schools.com/html/html_images.asp

Organize my contacts

How do I organize my contacts for a more efficient and targeted sending?

There are a number of uses to organizing or grouping your contacts, such as:

Sending them a more targeted broadcast (one-off) messages
Adding/moving them to new autoresponders
Cancelling their subscription to a specific autoresponder

… and so on.

Here is a sample scenario:

You want to group your contacts so you could easily send them more targeted broadcast (one-off) messages in the future regardless of their existing autoresponder subscriptions.

This is how to do it:

First, you need to have a clear structure in mind. For instance, let’s say you want to organize your contacts like this:

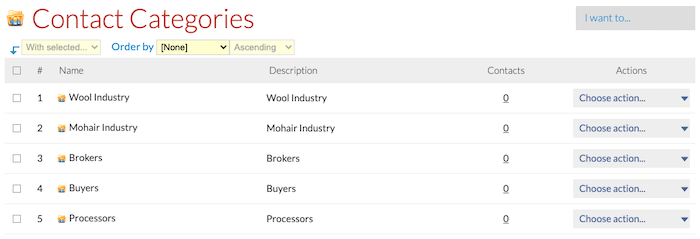
Wool Industry
     Brokers
          Company 1
          Company 2
          Company 3
          Company 6
     Buyers
          Company 1
          Company 2
          Company 3
          Company 6
     Processors
          Company 1
          Company 2
          Company 3
          Company 4

Mohair Industry
     Brokers
          Company 2
          Company 4
          Company 5
          Company 6
     Buyers
          Company 2
          Company 4
          Company 5
          Company 6
     Processors
          Company 2
          Company 4
          Company 5
          Company 6

… with all Company Xs (1s, 2s, 3s, etc.) being the same company that has its own brokers, buyers, and processors.

Once you have the structure figured out, simply use the ‘Categories’ and/or ‘Tags’ features together with the ‘Segments’ feature, as laid out below.

1. Create the following categories (see How to create contact categories)
2. Create the following tags (see How to create contact tags)
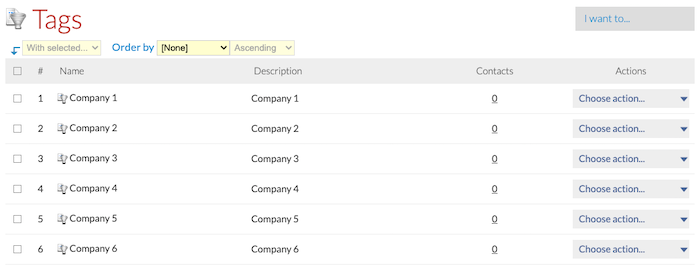
Note: Instead of creating tags for each company, you can also opt to utilize the Company standard field or add them as contact categories. We’ll be using tags in this example.

3. Create and set up your segments (see How to create segments)

Let’s say you want to have a group that consists of only those that fall under:

Wool Industry > Buyers > Company 2

The segment should have ALL of the following criteria:

Criteria 1 – Wool Industry
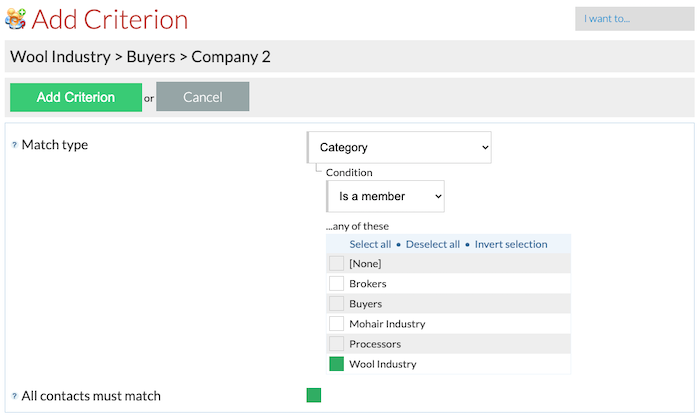
— Match type: Category
— Condition: Is a member
… any of these: Wool Industry
— All contacts must match: Checked

Criteria 2 – Buyers
— Match type: Category
— Condition: Is a member
… any of these: Buyers
— All contacts must match: Checked

Criteria 3 – Company 2
— Match type: Tag
— Condition: Has tag
… any of these: Company 2
— All contacts must match: Checked

You could also create another segment to filter only those that belong to:

Wool Industry > Processors

Criteria 1 – Wool Industry
— Match type: Category
— Condition: Is a member
— … any of these: Wool Industry
— All contacts must match: Checked

Criteria 2 – Processors
— Match type: Category
— Condition: Is a member
— … any of these: Processors
— All contacts must match: Checked

And if you want to filter all the:

Processors

… regardless of the company or industry, then just use the existing ‘In Category’ predefined filter on the Contacts list screen:

Or use the ‘Has Tag’ predefined filter:

… if you want to filter and see those that are under:

Company 6

… regardless of what they do.

Tip! Don’t be afraid to play around with the different segmentation features. Just remember, when creating segments, be mindful of the ‘any of these…’ statement. If it should be industry-specific, for example, then one criteria should only be for that one industry category. Also, the ‘All contacts must match’ option is more often checked than not. It could be a little confusing, but adding test contacts and categories/tags and playing around with the segments feature will allow you to get the hang of it.

4. Create and schedule your broadcast (see How to schedule a broadcast)

Finally, when scheduling a broadcast message, simply choose either of the following ‘Recipients’ options:

Contact category members
In segment
Has tag
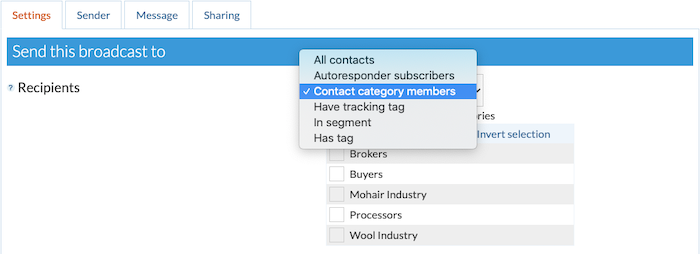
… and finish scheduling the broadcast accordingly.

Warm up my IP address

How do I warm up my email server IP address?

IP address warming is a gradual process that happens over a period of time. The aim of warming up an IP address is to establish trust and good reputation with the ISPs (Internet service providers) as a sender of legitimate, high quality emails at volume.

Warming up your IP address is the time to take a careful look at every aspect of your email marketing process, including your aims and goals. You should be able to make tweaks that will improve your overall long-term results, not just during the warm up.

Please note though that a structured “introduction” of your email server to the world while ramping up your sending volume does not guarantee trouble free sending of emails forever. You will need to play by “the rules” and utilize good list-hygiene practices.

Why do I need to warm up my IP address?

In short, too many emails that get sent are spam (unwanted emails) and the ISPs want to protect their users from receiving unwanted emails.

As a result, ISPs treat any new IP address that sends emails with skepticism. The ISPs only reduce that skepticism once the sender has proved their reputation.

What do ISPs expect from email senders?

The ISPs build up a ‘sender score’ for IP addresses and domain names based on metrics that differentiate legitimate emails from spam. These include:

Send volume
Spam complaints
Messages sent to unknown users
Subscriber engagement
Infrastructure
Spam trap hits
Content

… and more.

To start with, an IP address has a neutral sender score. Every time someone hits the spam button, or you get a hard bounce, or your email is sent to an unknown user, your credit rating goes down.

How do I get a good email sender reputation?

• Follow best practices
• Make sure your DKIM, SPF, Sender-ID, and Domain Keys are set up properly:

https://en.wikipedia.org/wiki/Reverse_DNS_lookup
https://en.wikipedia.org/wiki/DomainKeys_Identified_Mail
https://en.wikipedia.org/wiki/Sender_Policy_Framework
https://en.wikipedia.org/wiki/Sender_ID
https://en.wikipedia.org/wiki/DomainKeys

• Comply with the CAN-SPAM Act and other international anti-spam laws
• Only send to people who have opted in to receive emails and confirmed their request
• Do not buy lists from email brokers
• Avoid including large attachments and certain attachment types (.exe, .zip, .swf, etc. should be avoided)

So, how do I warm up my email server IP address? This is how to do it: 

The goal is to build up approximately 30 days of sending history so that ISPs have an understanding of the type and quality of emails being sent by your new IP address. The warm up ramp-up period may take longer than 30 days for some senders and can be less for others.

The basic approach is to estimate your total monthly email volume and divide that number by 30. Then try to spread your sending evenly over the first 30 days.

For example, if you will send 90,000 emails per month, you should start off sending 3,000 per day over the first month. Or, if you typically send about 300,000 emails per month, warm up your IP address by sending 10,000 emails per day for the first month.

For larger numbers (i.e., sending 500,000+ emails per month), you will need to extend the warm-up period to possibly over 2 months. You can also consider incremental increases to your daily send volume (e.g., 3,000 for 4 days > 4,000 for 4 days > 5,000 for 4 days > 7,500 for 4 days > 10,000 for 4 days, and so on).

There are no hard and fast rules but here are some guidelines:

• Send first to your best, most active customers
• Send consistently (having a consistent email volume from one day to another is much better than having a large volume sent on one day of the week and no email sent on the remaining days)
• Start with a hundred or so messages an hour
• Increase the hourly rate gradually
• Monitor your logs
• If the ISPs start sending back 4xx failures, you are going too fast, so slow down

Other hints and tips

• Split large, non-time-sensitive sends over a number of days
• Split campaigns between your new IP address and your legacy email system
• Create non-time-sensitive campaigns (e.g., subscriber surveys) to use specifically for the purpose of ramping up new IP addresses

Reputation Monitoring Sites:

Sender Score – https://www.senderscore.org/
Sender Base – http://www.senderbase.org
Cyren IP Reputation Check – https://www.cyren.com/security-center/cyren-ip-reputation-check
Barracuda Central – https://www.barracudacentral.org/lookups/
Spamhaus – https://www.spamhaus.org/
Microsoft SNDS – https://postmaster.live.com/snds/

Avail of the free installation

How do I avail of the free installation that came with my arpReach license?

While arpReach can be installed by anyone, you still need to have a basic understanding of how to modify and upload files on your server, as well as an understanding of how to make changes and adjustments to your website hosting using either a hosting control panel or command line interface.

Most (not all) arpReach license package offers usually come with one (1) free installation. If you are not comfortable enough to do the installation on your own, you may avail of the free installation service once your purchase has been confirmed.

This is how to do it:

To check your eligibility and/or avail of the one (1) free installation service that came with your new arpReach license, send an email to:

sales@arpreach.com

… with all of the following information:

  1. Your domain name
  2. Your arpReach license number and password (from your order confirmation email)
  3. The name of your web hosting company
  4. Your hosting cPanel login page and credentials
  5. Your hosting account FTP login page and credentials

When they have all of these information, they can schedule your installation and will email you if they need any more details and/or when your installation is complete.

Installations are normally completed within one business day, excluding weekends and UK holidays.

If you are no longer eligible for a free install, our partner offers professional installation services:

https://arpreach.com/install

How Do I… ?

In this section, you will find answers to some of the common questions about using our autoresponder software.

Some of the questions we answer cover some of the basics, while some cover advanced topics that email marketers need to know to improve conversions and ROI and generally use our software more effectively.

Here is a list of the questions and topics available:

How do I avail of the free installation?

How do I warm up my IP address?

How do I organize my contacts?

How do I add images to messages?

How do I add videos to messages?

How do I send out a different series of messages to openers?

How do I remove unsubscribers from an autoresponder?

How do I remove failed subscriptions from an autoresponder?

How do I track the source of clicks?

How do I customize user-facing pages?

How do I manage multiple websites in one arpReach system?

How do I move arpReach to HTTPS?

How do I remove a registered domain?

How do I extend the login duration?

How do I use Zapier with arpReach?