How do I organize my contacts for a more efficient and targeted sending?
There are a number of uses to organizing or grouping your contacts, such as:
Sending them a more targeted broadcast (one-off) messages
Adding/moving them to new autoresponders
Cancelling their subscription to a specific autoresponder
… and so on.
Here is a sample scenario:
You want to group your contacts so you could easily send them more targeted broadcast (one-off) messages in the future regardless of their existing autoresponder subscriptions.
This is how to do it:
First, you need to have a clear structure in mind. For instance, let’s say you want to organize your contacts like this:
Wool Industry
     Brokers
          Company 1
          Company 2
          Company 3
          Company 6
     Buyers
          Company 1
          Company 2
          Company 3
          Company 6
     Processors
          Company 1
          Company 2
          Company 3
          Company 4

Mohair Industry
     Brokers
          Company 2
          Company 4
          Company 5
          Company 6
     Buyers
          Company 2
          Company 4
          Company 5
          Company 6
     Processors
          Company 2
          Company 4
          Company 5
          Company 6
… with all Company Xs (1s, 2s, 3s, etc.) being the same company that has its own brokers, buyers, and processors.
Once you have the structure figured out, simply use the ‘Categories’ and/or ‘Tags’ features together with the ‘Segments’ feature, as laid out below.
1. Create the following categories (see How to create contact categories)

2. Create the following tags (see How to create contact tags)
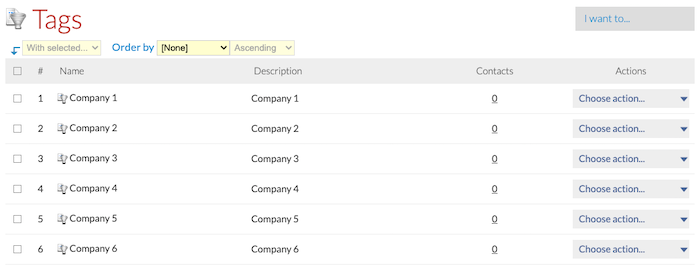
Note: Instead of creating tags for each company, you can also opt to utilize the Company standard field or add them as contact categories. We’ll be using tags in this example.
3. Create and set up your segments (see How to create segments)
Let’s say you want to have a group that consists of only those that fall under:
Wool Industry > Buyers > Company 2
The segment should have ALL of the following criteria:
Criteria 1 – Wool Industry
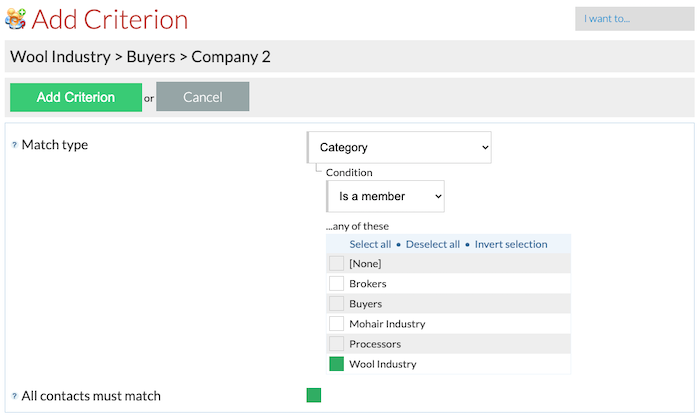 — Match type: Category
— Condition: Is a member
— … any of these: Wool Industry
— All contacts must match: Checked
Criteria 2 – Buyers
— Match type: Category
— Condition: Is a member
— … any of these: Buyers
— All contacts must match: Checked
Criteria 3 – Company 2
— Match type: Tag
— Condition: Has tag
— … any of these: Company 2
— All contacts must match: Checked
You could also create another segment to filter only those that belong to:
Wool Industry > Processors
Criteria 1 – Wool Industry
— Match type: Category
— Condition: Is a member
— … any of these: Wool Industry
— All contacts must match: Checked
Criteria 2 – Processors
— Match type: Category
— Condition: Is a member
— … any of these: Processors
— All contacts must match: Checked
And if you want to filter all the:
Processors
… regardless of the company or industry, then just use the existing ‘In Category’ predefined filter on the Contacts list screen:

Or use the ‘Has Tag’ predefined filter:

… if you want to filter and see those that are under:
Company 6
… regardless of what they do.
Tip! Don’t be afraid to play around with the different segmentation features. Just remember, when creating segments, be mindful of the ‘any of these…’ statement. If it should be industry-specific, for example, then one criteria should only be for that one industry category. Also, the ‘All contacts must match’ option is more often checked than not. It could be a little confusing, but adding test contacts and categories/tags and playing around with the segments feature will allow you to get the hang of it.
4. Create and schedule your broadcast (see How to schedule a broadcast)
Finally, when scheduling a broadcast message, simply choose either of the following ‘Recipients’ options:
Contact category members
In segment
Has tag
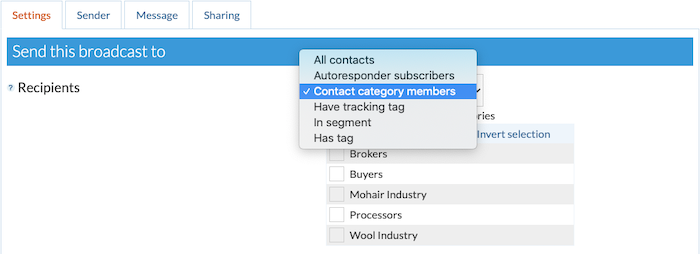
… and finish scheduling the broadcast accordingly.